While 3D Printing is often used to make gadgets, gizmos and doodads to show off the functionality of the printer, it’s less often that 3D printers seem to get utilized for functional prints. These functional prints are objects which have a use beyond art or showing off. I’m going to try to keep a list of the functional prints I make, that I can share publicly, for use in prototyping or just to solve little problems here and there.
The first such print is detailed below. If you’ve ever had an old but very comfortable desk or working chair, you know it’s nice to get as much life out of the chair as possible, it can take months to get comfortable in a new chair. My chair at work started losing hydraulic pressure in the cylinder, and during the day I would sit up, pull the lever and let the chair return to full height, I must have done this 30 times, while turning down offers of alternative chairs but also wanting to solve the problem.
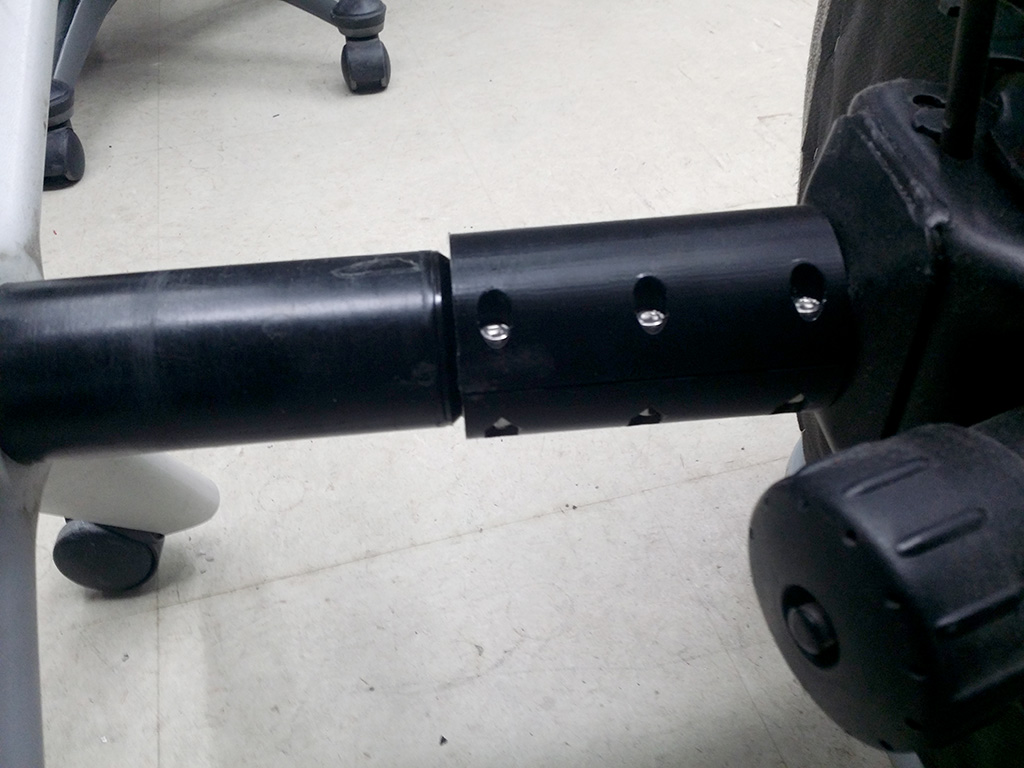
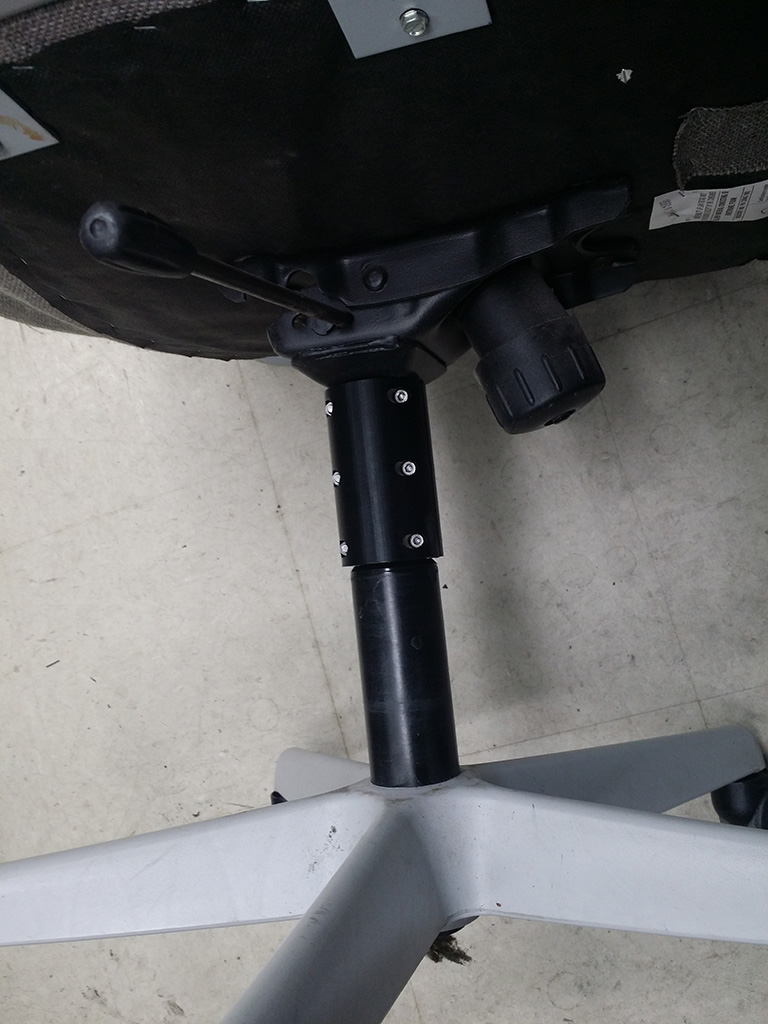
Basically it’s a 2 piece shaft collar 100mm long, it clamps around the raised piston and keeps it from sinking any further, while still allowing the chair to rotate normally. This picture was taken after a full day of use in a production environment and it held up very well.
I drew the part up quickly in Fusion 360, it was a simple design. It had to fit around a 28mm shaft, have a thick enough sidewall to accomodate the six 5mm x 25mm long bolts and have a hex hole on one side for the nut for the bolt. The opposing side is the exact same part, so I just designed one half and printed two.
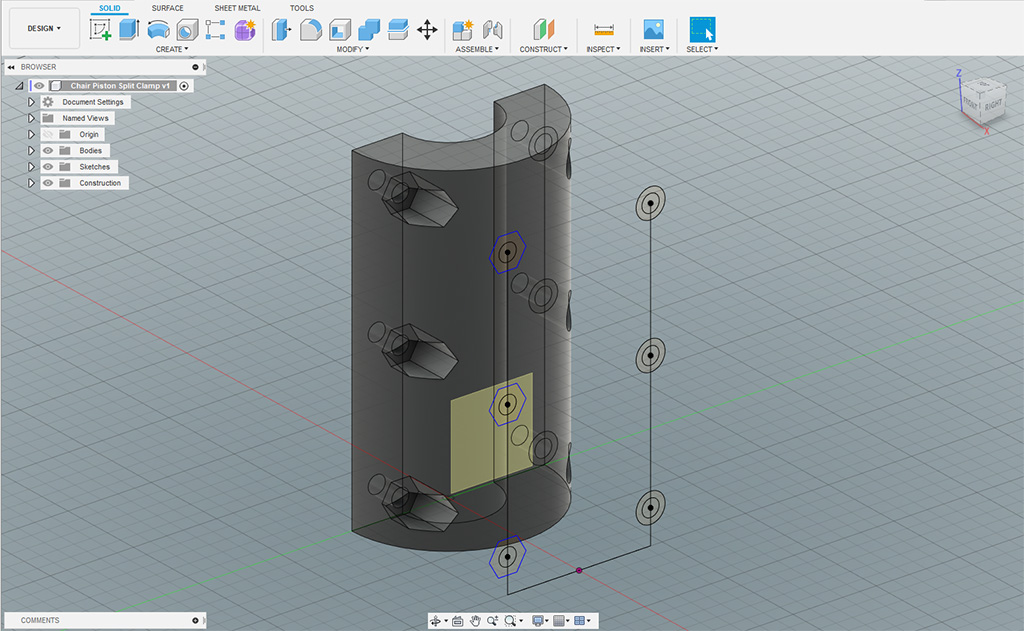
I sketched out the cylinder, extruded to 100mm, then added an offset plane to sketch the holes, counter-sink and hexes on. I extruded the holes through the part, and then countersunk the screw head bores, and the hex bores the exported to an STL file to bring into PrusaSlicer
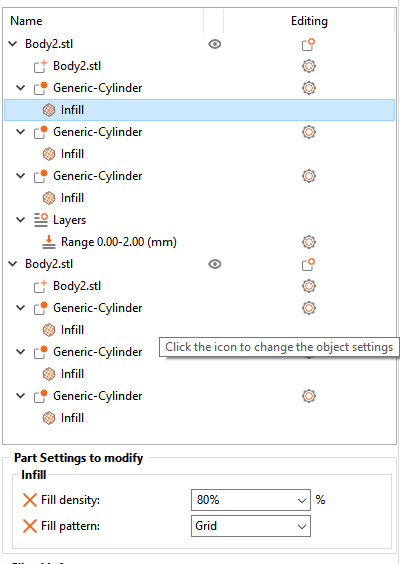
I could have printed the whole part with a fixed infill, but it’s quite a large part so I decided to do conditional infill, with the primary infill being at 50% and the infill around the screws being 80%. In order to do this, in PrusaSlicer I added three cylinders and space them out along the model.
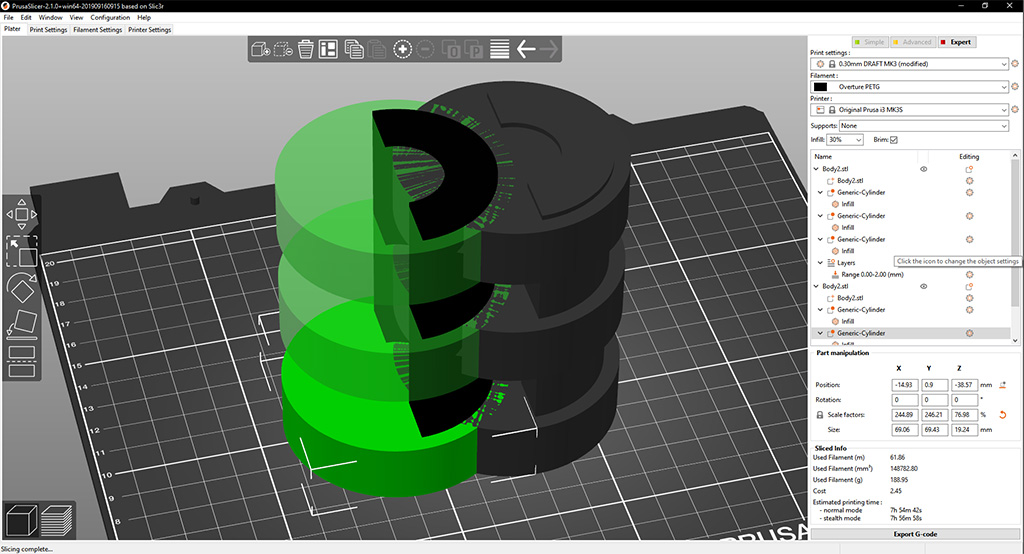
Once they were where I wanted them, I right clicked on them and selected Infill to create a custom infill in the right objects column, then set the infill to 80%.
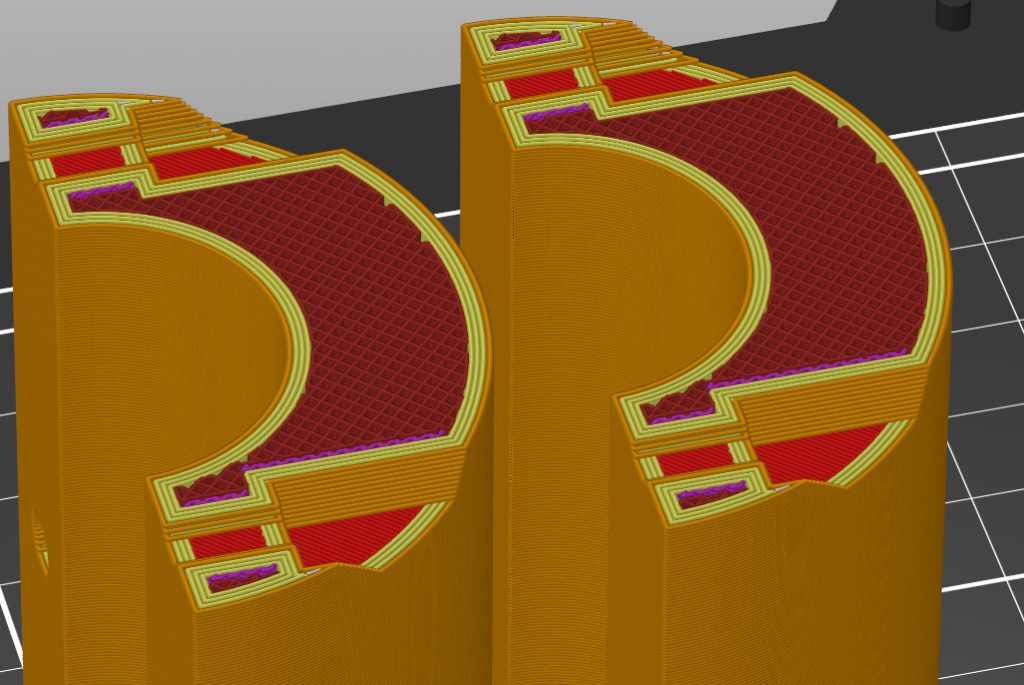
I then selected everything and copy (ctrl-c) pasted (ctrl-v) the set so I had two of them then sliced the g-code. In the photo below you can see the 80% infill in a band around the two components.
From there it was just a matter of exporting the code to a flash drive and putting it in the Prusa i3 Mk3s 3D Printer (internal link) to produce the parts. I used Overture Black PETG filament (external link) to print the part and let the print run overnight, it took about 8 hours to print the parts, and in the morning I had a fresh set of parts to take to work and try out. I didn’t grab a photo of the parts on the print bed, but I do have another picture of them installed.
This solution has proven durable so far. I use this chair in a production environment, constantly getting up, sitting, spinning, rolling back and forth, etc. The chair is at the perfect height for my workbench and super comfortable to work from, so I’m glad it worked out.
1 responses to Chair Cylinder Split Clamp – Functional 3D Printing
Genius. I have had a few work chairs that were super comfortable but unfixable. I currently have a chair at home with this problem. Thank you for the fix and the detail in all your postings.
Leave a reply to Chair Cylinder Split Clamp – Functional 3D Printing