I’ve been wanting to get a Prusa Mk3 for a while and the opportunity finally came around for me to be able to buy the kit version of the printer. I have my DIY OB 1.4 printer which I built from scratch back in 2013 but it always seems to be taken apart for some project or experiment and rarely just available when I want to print something. The Prusa I3 Mk3s has a ton of great features mechanically and electronically and it’s going to be my everyday available printer for various projects and experiments.
The Prusa Mk3s was pretty easy for me to assemble, I’m mechanically adept so it was no problem and I had the printer together in about 5 hours. The documentation is very detailed and well written and I think anyone with minimal mechanical assembly experience would be able to build it as well. The manual is available online if you want to see what it’s about.
As someone who has been into 3D printing for quite a few years and has built a variety of 3D printing and done quite a bit of 3D printing I would definitely recommend this printer either as a first 3D printer for someone who can afford the cost but can’t afford a super-high end printer, or as a second 3D printer for someone who has used some of the really cheap ones, but is ready for something that will just work.
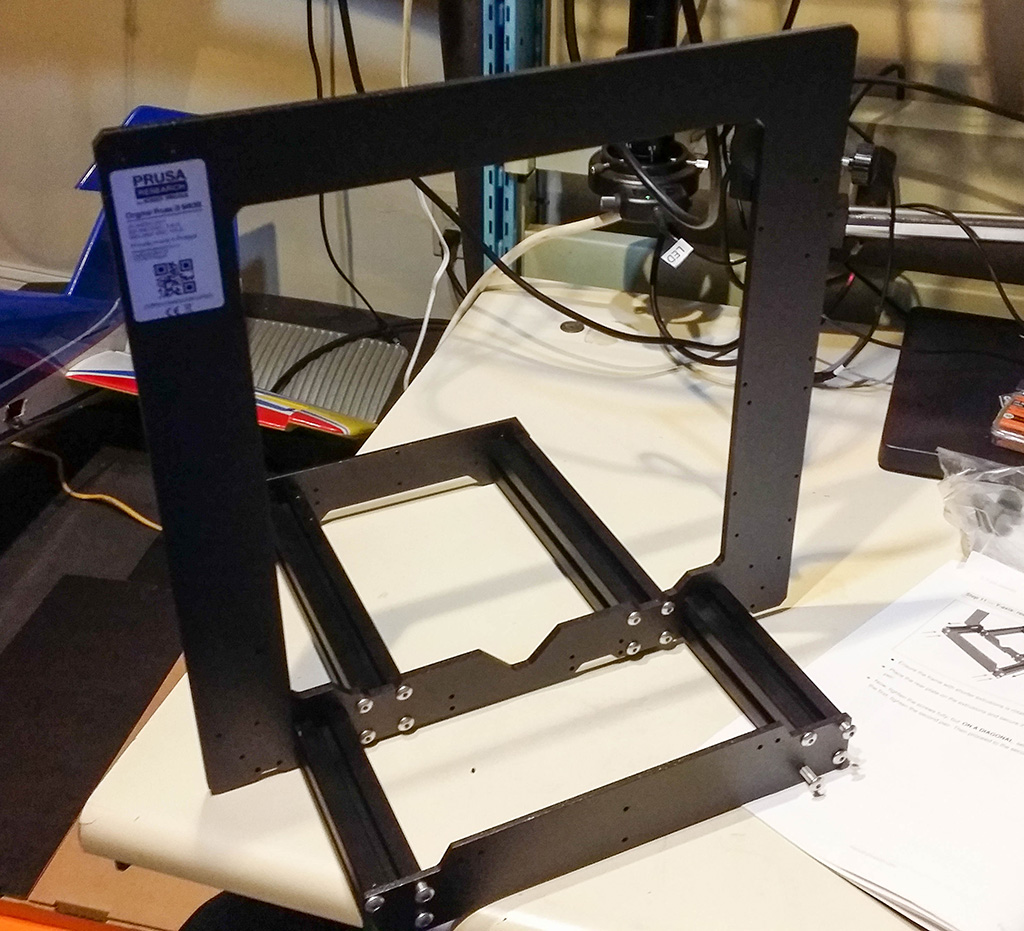
The printer assembles in a few stages, you build the frame, first, it’s made from sturdy extrusion and cut or stamped metal parts. The base of a printer is important because its rigidity is what gives the rest of the printer stability when the axis are moving around extruding plastic for your design.
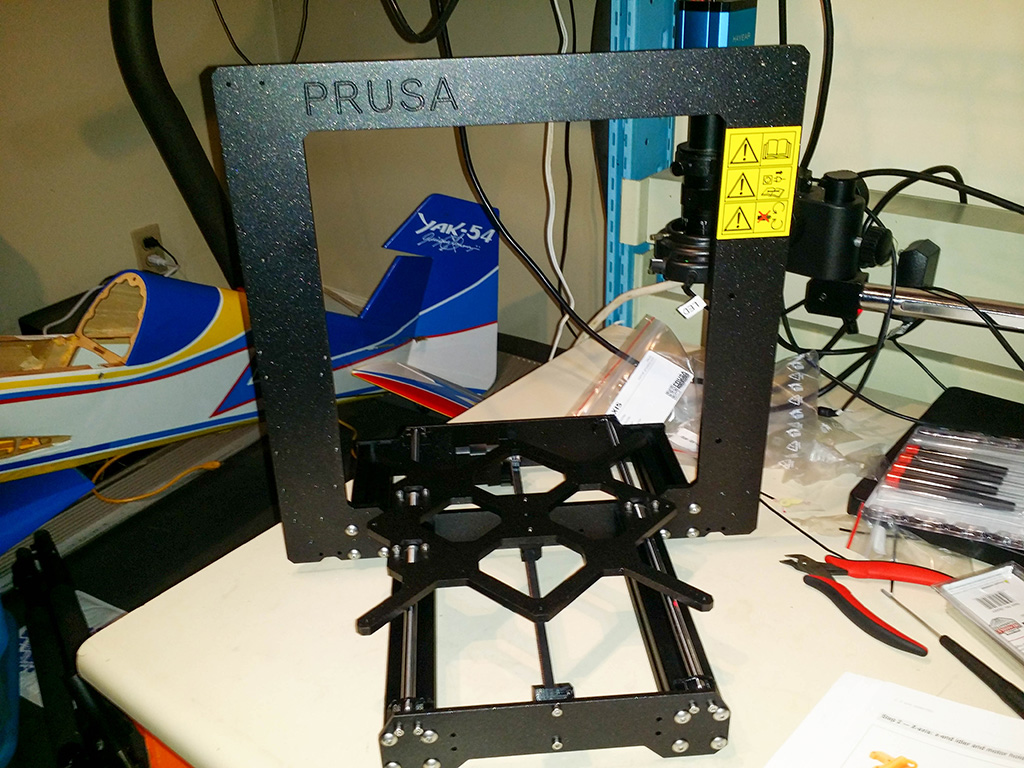
Once you assemble the base of the printer, you add the components for the Y-Axis (the bed) of the printer. There are a couple of important steps in the manual to follow. One of them tells you how to position the balls inside of the linear bearings relative to the rail. Be sure to follow this!
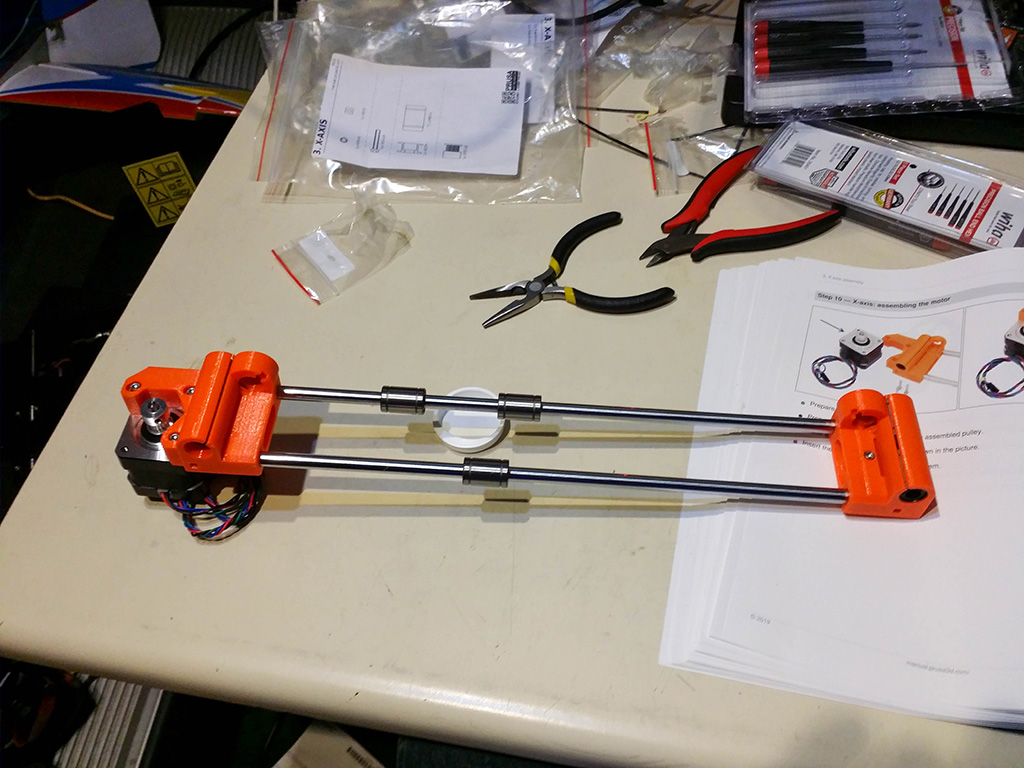
Once the Y-axis is built, then you build the X-axis. The metal rods you see have to slide into the plastic housing. In my kit this was very tight, which is good because, again, it adds rigidity to the build. I had to tap the rods carefully into the housings to avoid damaging them, while ensuring they were fully seated. If you get to this part of the build, don’t get frustrated and start smashing stuff together, take some time to assess the situation and tap those rods in gently while supporting the plastic part firmly against a solid object.
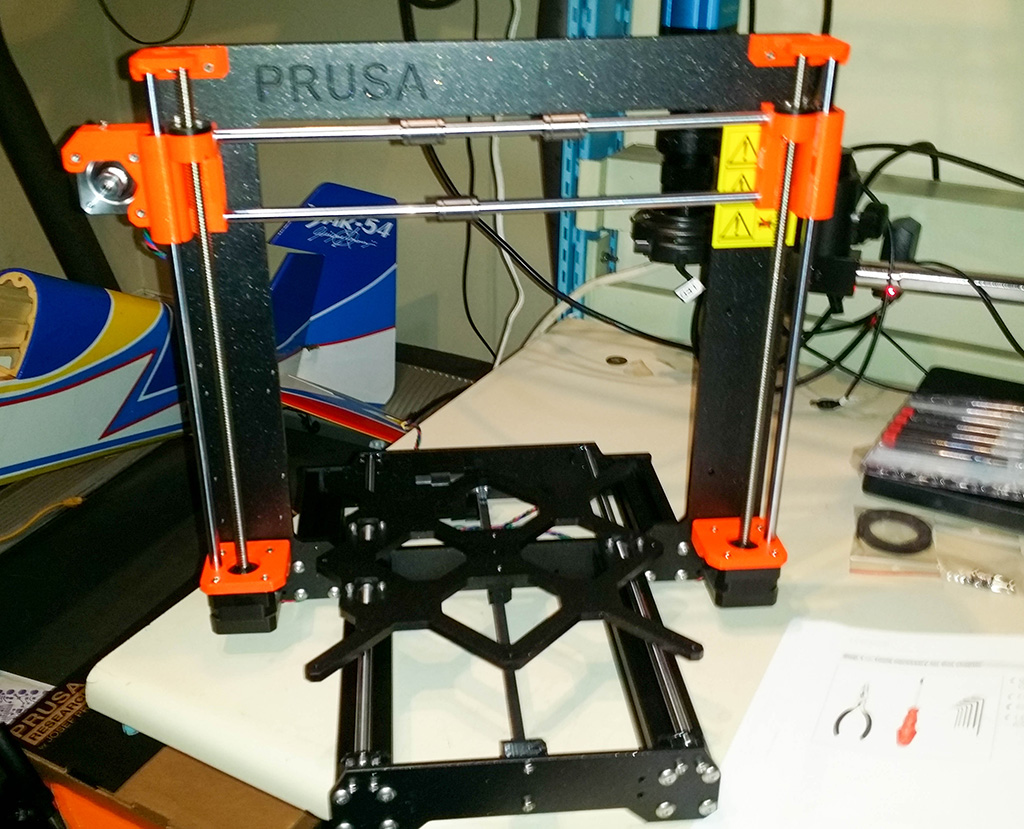
The next stage is mounting the z-axis motors which have the threaded rods built into them, this part was pretty easy and not much to talk about that the manual doesn’t already cover.
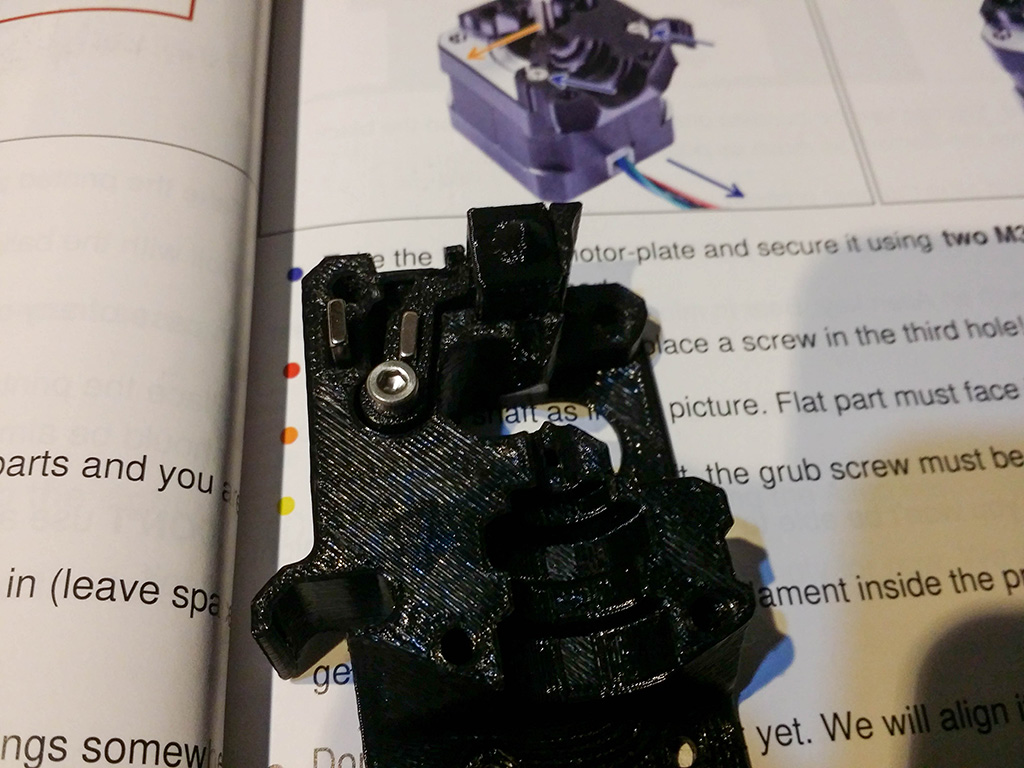
The extruder is next, you start with this back piece and install the magnets and the little filament sensor flag attached to magnets. It is important that the magnets push each other apart, this is what it should look like.
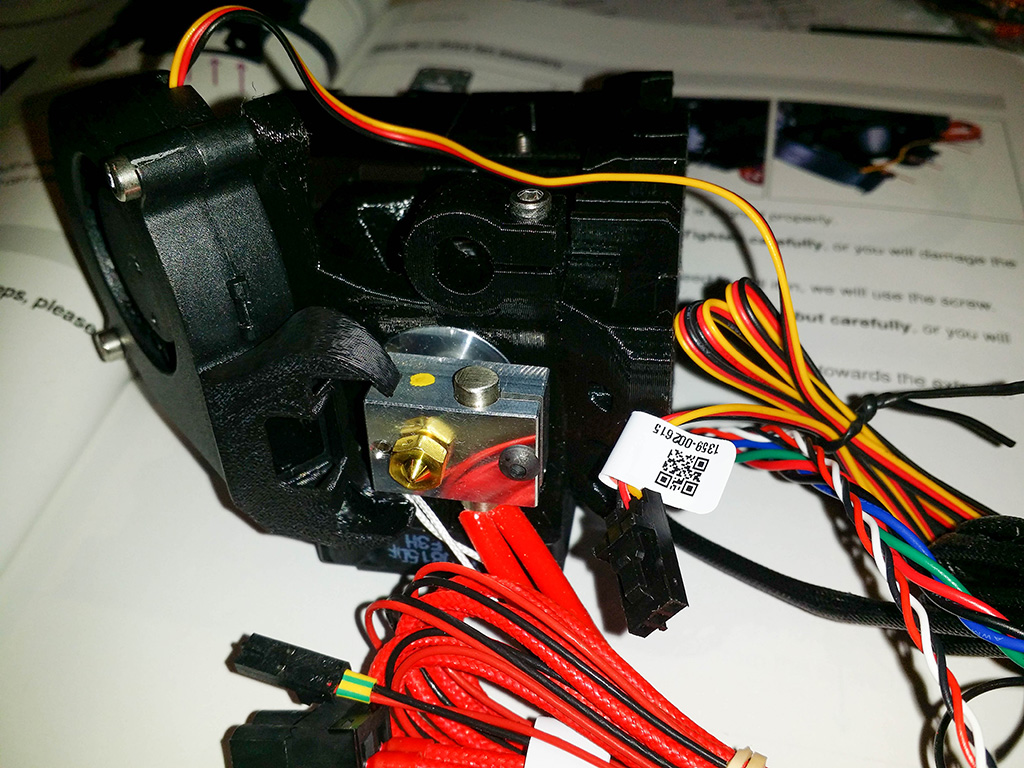
There are quite a few steps and details in putting the extruder together. Take your time doing it, it’s the most difficult part of assembling this printer. Break it up into stages and take a break between each stage if you have to. Once this component is mounted to the printer you don’t want to have to take it off to correct an assembly error.
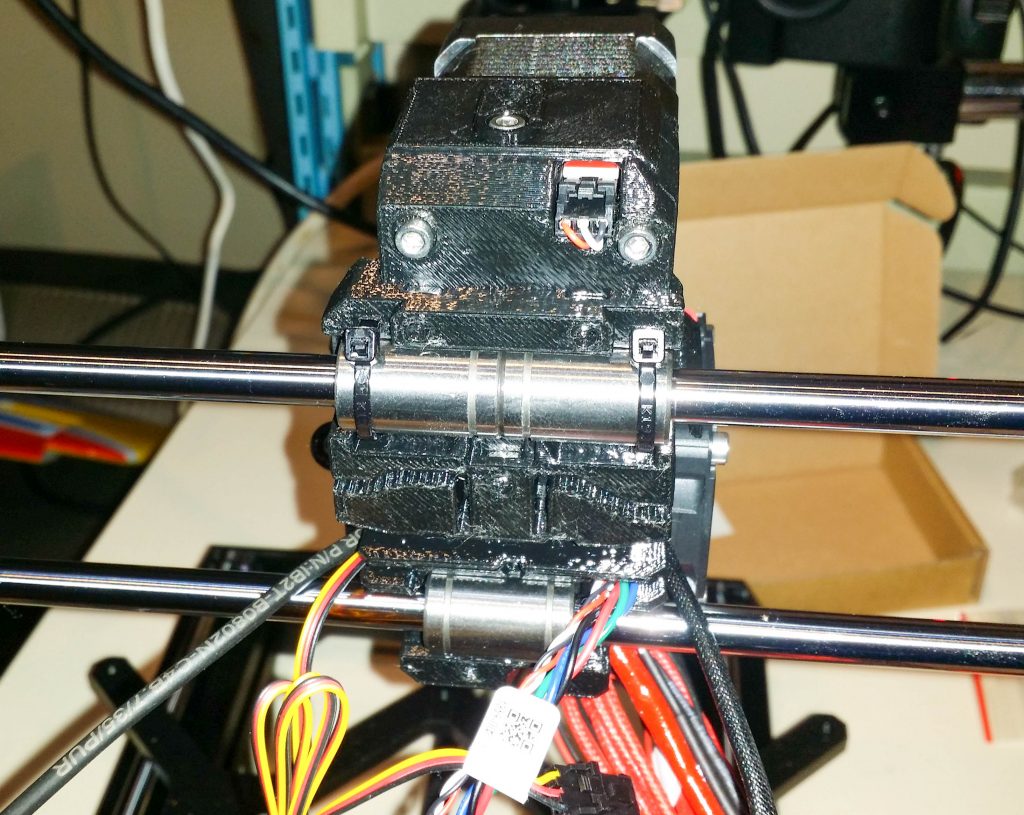
The extruder assembly then gets mounted to the X-Carriage with zip ties on the upper bearing. I wasn’t a big fan of this at first, but it seems to be working really well, and the back cover applies some additional clamping to the bearings.
After those main steps you’ll get into mounting the power supply and the electronics. The manual covers it well and there’s not much that I could add to make it easier for you. Again just take your time with it and enjoy the process.
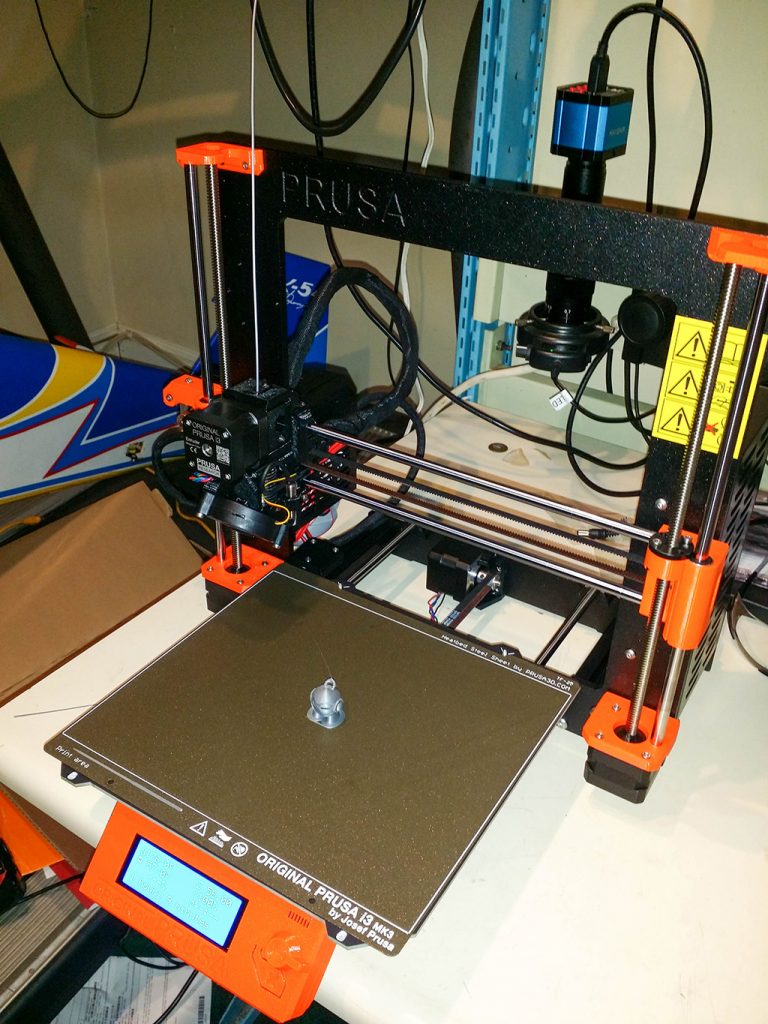
Once you get the printer assembled, you go through a guided first time calibration process to setup the printer, this took about 20 minutes.
There is a process to calibrate the print height using the ‘Live Z-Adjust‘. This is really important to do and get set right according to the manual to get proper layer adhesion.
I bought my printer with the powder coated bed option, Prusa says it’s important to clean the bed with 90% or higher IPA to get proper adhesion, but I was still having adhesion problems. Someone in a forum recommended first cleaning the bed with a ‘no fragrance’ ‘no skin conditioners’ dishwashing liquid and hot water first. I used Dawn and rinsed it off and dried it real good and this did the trick, I have adequate first layer adhesion now.
The little alien print was one of the ones on the included SD card. I just navigated the menu to load filament, loaded the included filament, and then selected ‘print from SD card’ and chose a small print. It came out great.
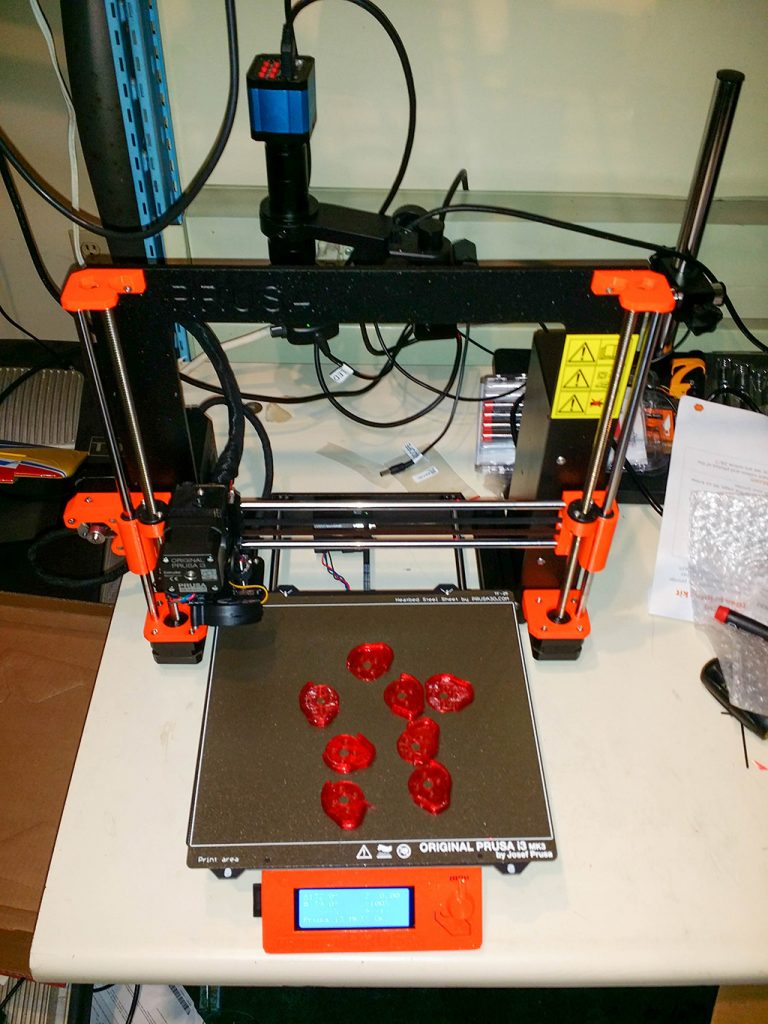
I really wanted to be able to print flexible filaments and the mk3s has been doing great with this so far. my first flexible prints were some rubber bumpers for the arms on my quadcopter.

Here you can see them in better detail. With 3D printing, the extruder often retracts the filament from the hot end when moving to prevent drips and strings between parts but this doesn’t work out well with flexible filaments as they can jam in the extruder. Even with this, the flexible parts above came out well with minimal stringing as the slicing software makes sure to move the nozzle over already printed parts rather than moving it across open spaces, this lets the drizzles fall into the model where they’ll be hidden forever. These parts were printed in YOYI flexible filament (amazon affiliate link) and turned out really well, the only reason I bought this filament over another was the number of reviews, and the number of positives compared to other options out there, if you’ve have really good experience with other filaments feel free to leave a comment.
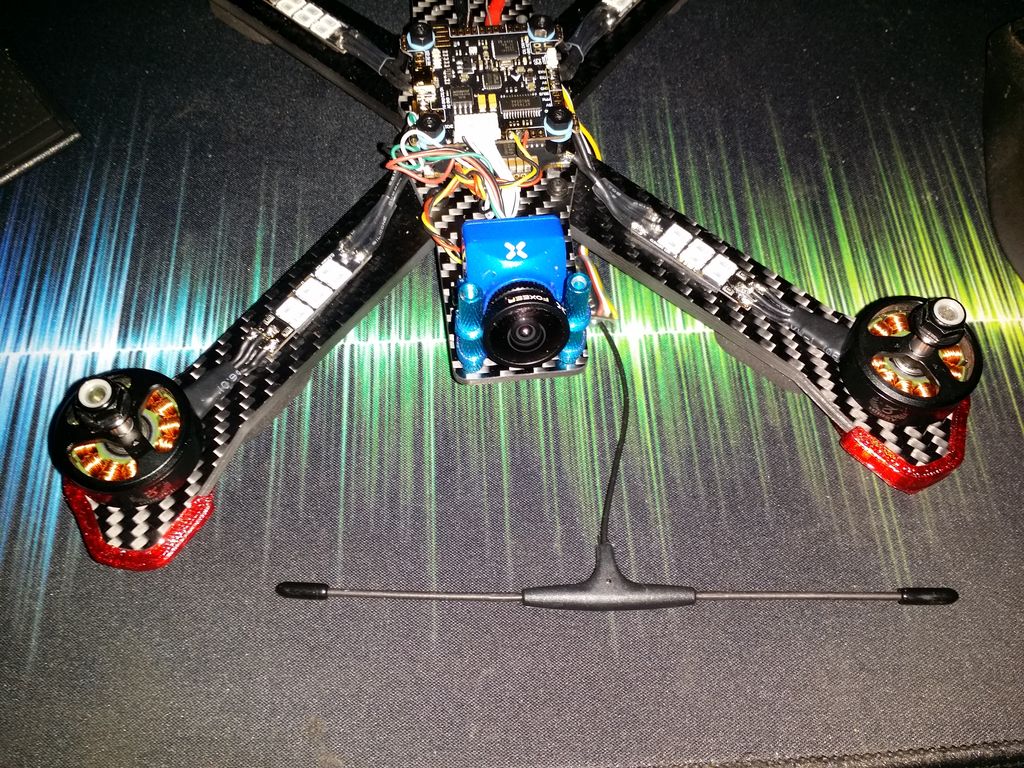
Here you can see the TPU parts mounted to the ends of the arms on my Rotor Riot CL1 quadcopter / drone frame. These will help limit damage to the arms if I’m hitting hard objects. The little stubs on the arms are to protect the motors, then the red parts are to protect the stubs. I’m guess the next stage of drone technology will be something to protect the rubber bumpers. My next project is to design and print a TPU holder for the Crossfire Immortal-T antenna you see sitting there.
Prusa I3 Mk3S 3D Printer 1 Trackbacks / Pingbacks
Chair Cylinder Split Clamp – Functional 3D Printing Comment on Prusa I3 Mk3S 3D Printer (December 7th, 2019 at 22:19)
[…] there it was just a matter of exporting the code to a flash drive and putting it in the Prusa i3 Mk3s 3D Printer (internal link) to produce the parts. I used Overture Black PETG filament (external link) to print […]
Leave a reply to Prusa I3 Mk3S 3D Printer