I had a project I was working on which needed to be reflow soldered because there were too many parts too close to each other to solder by hand. I needed to get a reflow controller up and running quickly. I made the little controller shown below by mixing a few easily available kits and the hardware development time was minimal, and because all of the kits had library support for them, I had the base coding done in an evening.
The reflow controller consists of mostly Adafruit kit parts and an Arduino Duemilanove board. I always enjoy putting kits together, it’s kind of therapeutic. Unfortunately I never have enough kits to fill randomly available time gaps, but I try to keep busy with other things. The Adafruit kits I used in this project are pretty basic and easy to put together in just a few minutes each. This post may look a bit like an Adafruit fanboy page but I like Adafruit and Sparkfun both equally for these kind of supplies, it’s just that I prefer to order all my parts for a project at the same time from the same vendor to reduce shipping costs, etc.
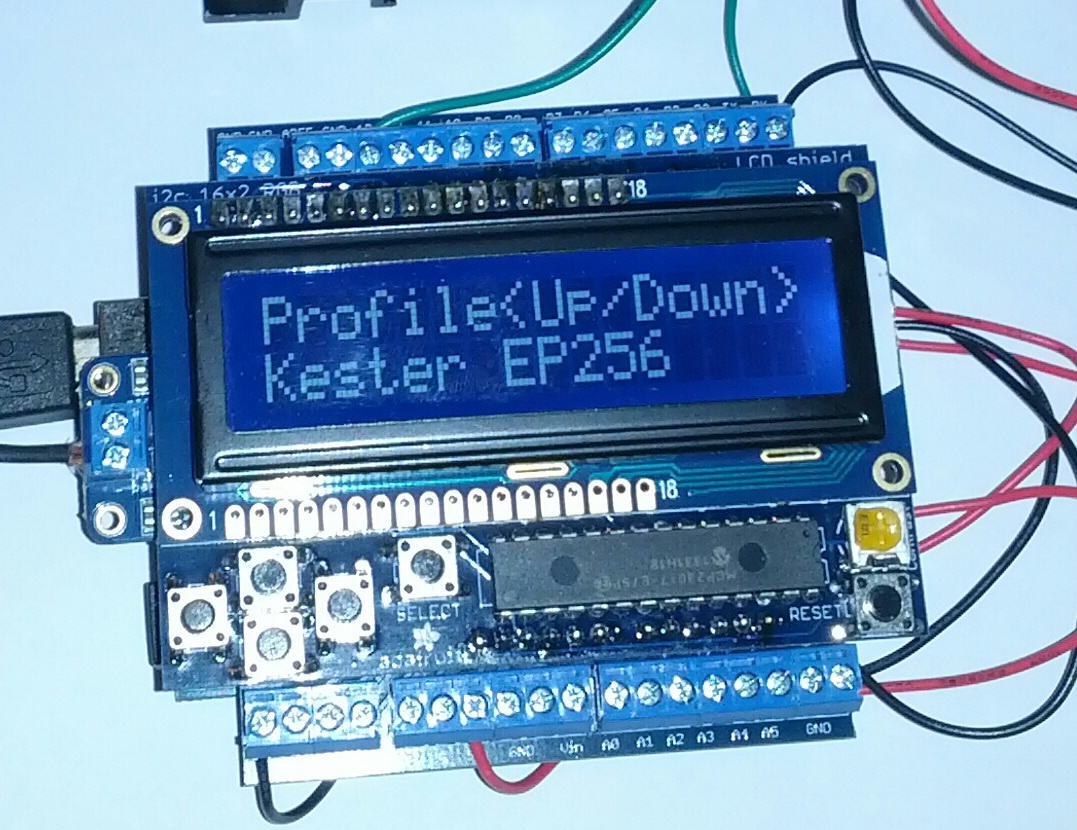
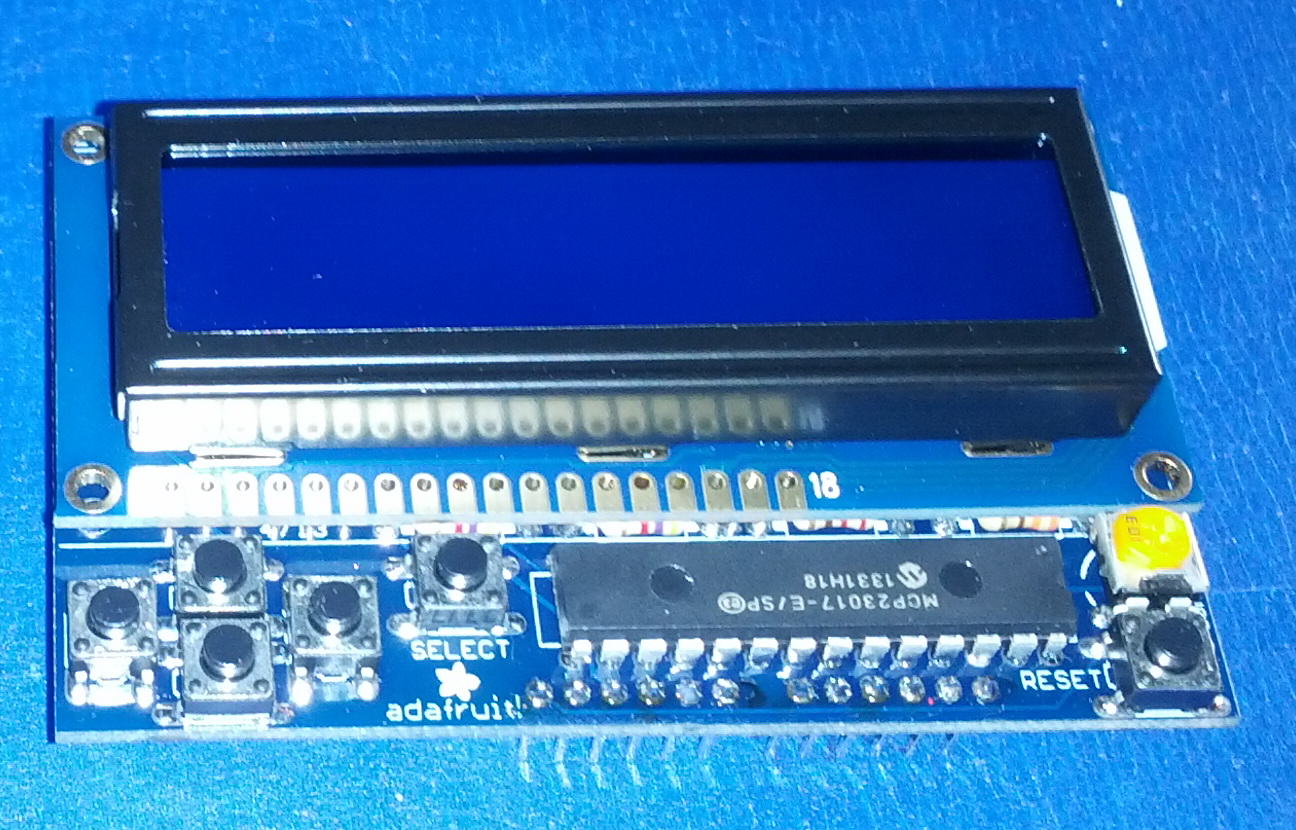
For my reflow controller I knew that I needed an LCD display and I wanted to be able to change the back light color to indicate various modes the controller would be in. I went for a 16×2 Negative RGB LCD display. The negative just means that the text is clear so the back light shows through it and the rest of the display is much darker but still translucent enough to let the back light be visible through it as well.

In order to interface the LCD to the Arduino I used the Adafruit 16×2 LCD shield which allows you to access the LCD display and some buttons with an i2c interface. Of course Adafruit has provided and Arduino library for this as well, so interfacing is again easy.
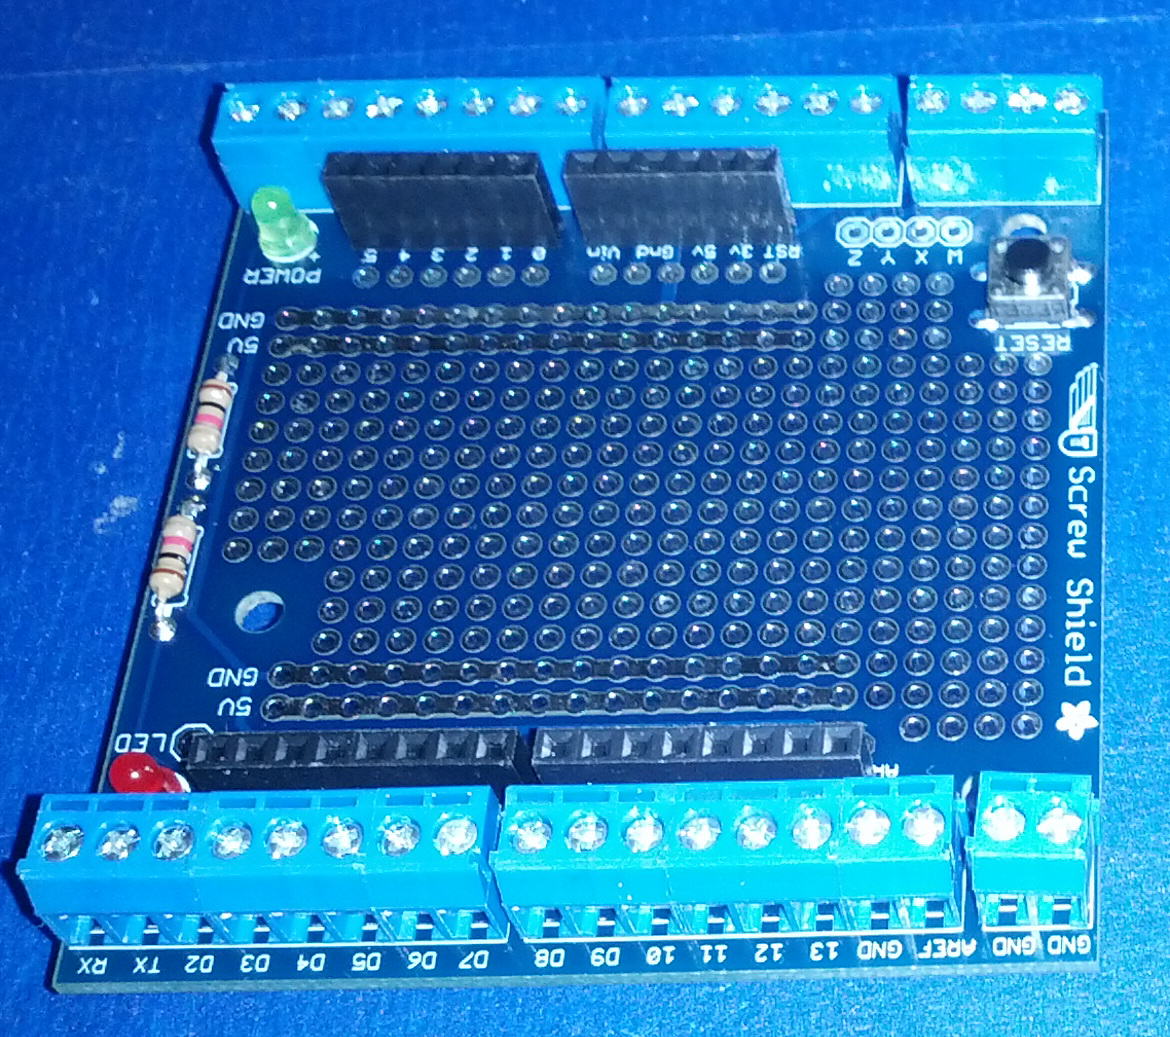
I also went with an Adafruit Screw Shield for it’s prototyping space and the strong and reliable connect that screw terminals provide. The board is quite nice, has pass-through headers for the Arduino pins, and provides easy access solder points for the Arduino pins.I like this board over the SparkFun screw shield because it has 4 additional screw terminals labeled WXYZ which you can connect to circuits in the prototyping space, really nice thought there! Either of these boards are a nice addition to a prototyping setup though.
I used the Adafruit MAX31855 breakout board to read the K-Type thermocouple for reading the temperature inside the oven. The MAX31855 is a nice thermocouple interface chip and Adafruit provides a library that makes reading the temperatures from it very easy. I soldered the breakout board directly to the edge of the screw shield and just ran power and the data lines to the defaults listed in the Adafruit library examples.
The SSR is a big one I used for my CNC Router when I was originally using a Dewalt Router as the spindle motor. Since I upgraded that to a Variable Frequency Drive spindle and controller it was free for this project. The SSR is rated at 25 Amps 480 Volts and came with a nice big heatsink as well and will take a 3-32 volt DC control signal input, it has no problem throwing the toaster oven around.
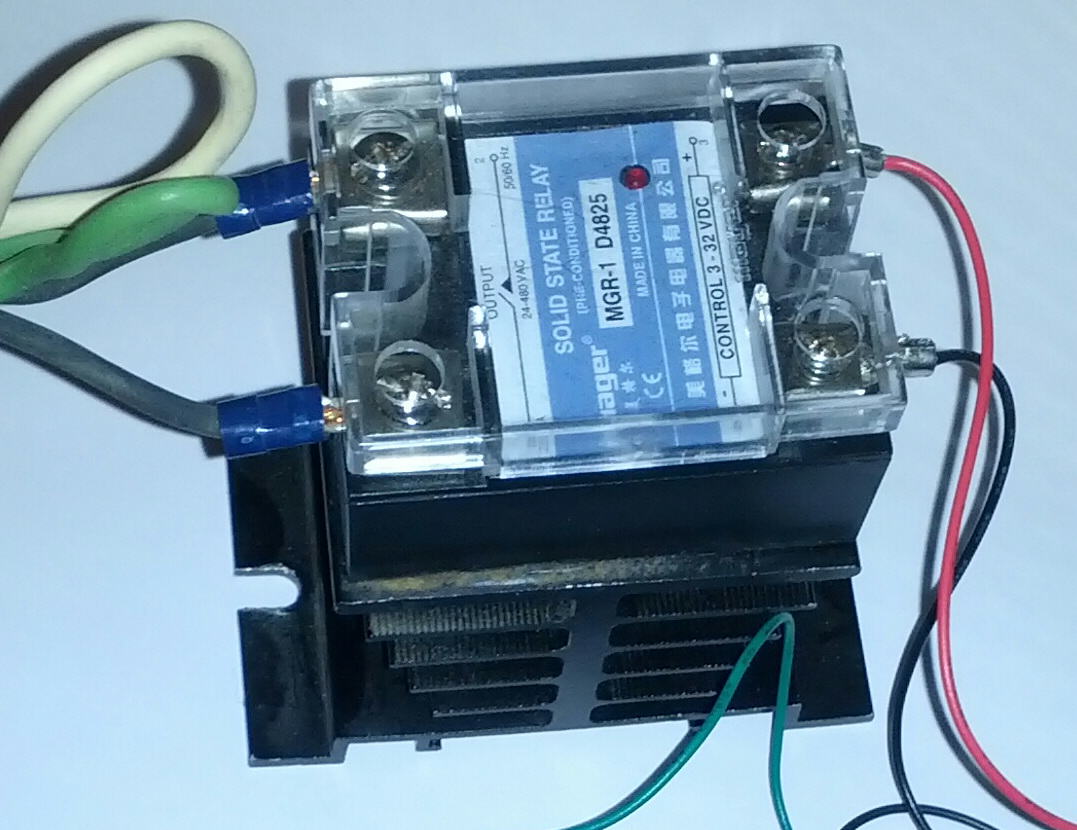
I tried to drive the SSR directly from the Arduino pin but it could sink enough current to fully turn the SSR on, which ended up with strange results. I used a NPN transistor connected to the Arduino output pin to sink the – terminal of the SSR and this resolved the problem. The schematic is slightly out of data as I did add a pull down resistor on the output pin.

Here’s a list of all of the parts I used in the project:
Adafruit 16×2 LCD Shield Kit
Adafruit 16×2 Negative RGB LCD
Adafruit MAX 31855 Breakout
Adafruit K-Type Thermocouple
Adafruit Proto Screw Shield
The non-Adafruit components I used were as follows:
Arduino Deumilanove
25 Amp 24-480V Solid State Relay (eBay item)
Generic NPN Transistor
10K Resistor
Black and Decker 1500 Watt Convention Toaster Oven
In the end I was able to get the board soldered and up and running well, it turned out great. For the moment I’m not posting the reflow code as I feel it’s not ‘up to snuff’ yet and needs more work. I will likely revise it during the summer as I work on more surface mount projects.
1 responses to Toaster Oven Reflow Controller Project
hello Jons
very good
very interesting , if you can please give me the link of .ino and libraries that you help me with this project I find no solution and , I am newbie in Arduino and soft
Thank you.
ale
Leave a reply to Toaster Oven Reflow Controller Project