
I’ve been working on a tricopter using a Turnigy X900 frame for some FPV fun-flying this year and having some fun putting that together. Unfortunately I had a bad motor and during my first test I damaged one of the fiberglass motor mounts beyond actual repair. I could (and still may) have made a home built tri-copter frame, but the X900 was $30 so I figured I’d at least give it a try.
While the mounts are 2.5mm thick FR4 type material, all I had on hand at the time was some 0.85mm FR4 so I cut out pieces of that and glued them together and sanded them, it worked out OK for the most part. But I had a wicked vibration. Here’s a video of my original repair that I didn’t think had worked, continue down for the alternate repair.
I thought the vibration was caused by the new mount being too flexible as it was quite a bit more flexible and perhaps a harmonic of some sort was being set up in the motor and arm. I went about making a new arm for the Turnigy X900 frame by doing proper drawings and cutting them out my CNC router.
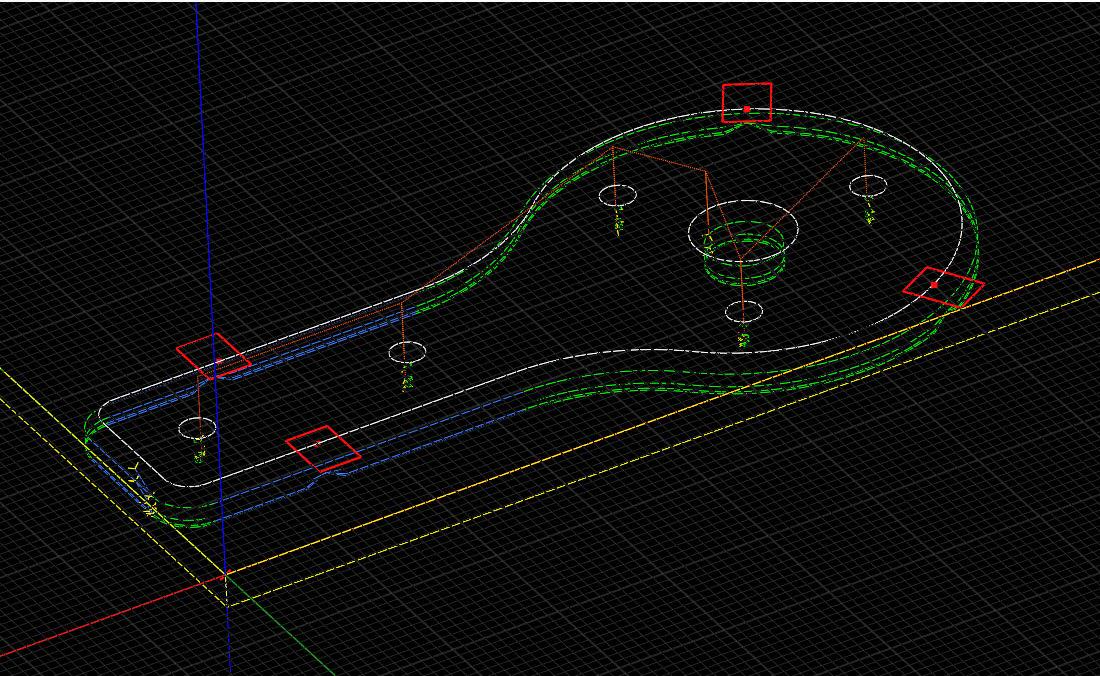
I ordered some blue 1/8th inch / 3.175mm thick FR4 from McMaster and spent some time doing the drawings, below is that CAD drawing of the motor mount that I made in Solid Edge Free 2d which is a functional 2D design program that takes a bit of practice, but works pretty good.

This mount is for the Turnigy X900 using DT-750 motors. The 23.8mmm diameter should be 23mm
The drawing is accurate enough for my uses, it does not exactly duplicate the radii of the original X900 motor mount. My version of the mount is designed specifically for the Hextronix DT-750 motor. The data sheet on the motor was hard to read and I misread the 23.0mm diameter as 23.8, it only required some minor file work to make up the difference when mounting the motor, but if you want it to be perfect, use 23mm.
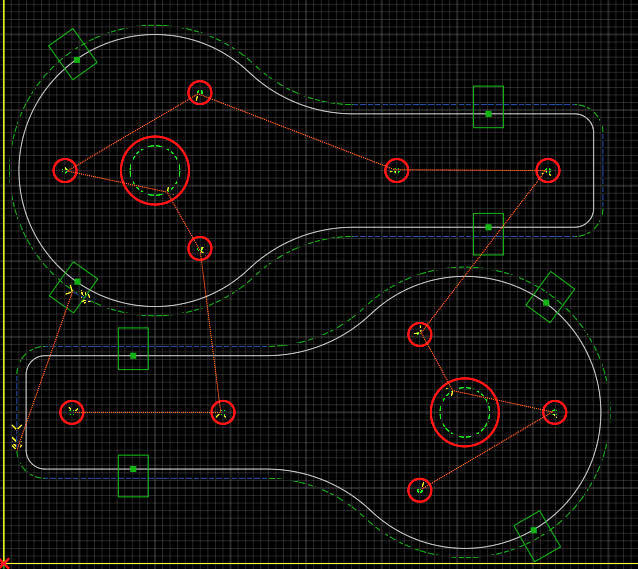
I exported the Solid Edge Free 2D drawing to a DXF file and imported it into CamBam and set up the tool paths. The little green blocks are hold down tabs which prevent the part from flying off the table when the outside is cut.
 I machined the parts on the router and even with using a vacuum with a dust separator and filter to suck up the fiberglass dust while wearing eye protection, gloves, a long sleeved shirt and respirator I still somehow managed to get some fiberglass dust on the top of my hands and it itched like crazy. I always cringe when I see people sand fiberglass with no protection. When I was in my late teens I used to spend 8 hour shifts cutting fiberglass cloth and mat, that was miserable.
The cutting of the parts was completed fairly quickly and I mounted them up to the tricopter in haste before sunset and gave it a test flight. There was a major improvement in the flying of the thing, but I could still hear a weird flutter from the left boom. At least now the whole frame wasn’t shaking. Eventually I replaced the rotor of the motor on the left arm and the major vibration went away. Oh well, at least I have 2 brand new shiny X900 motor mounts and the drawings I need to make as many as I might ever need.
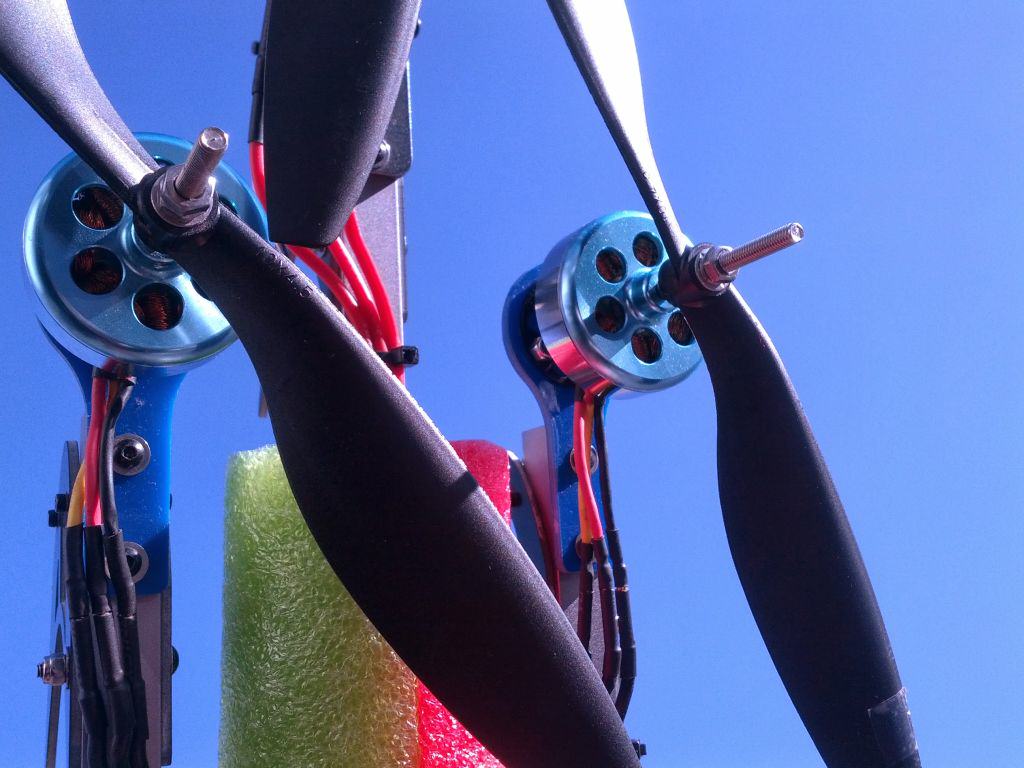
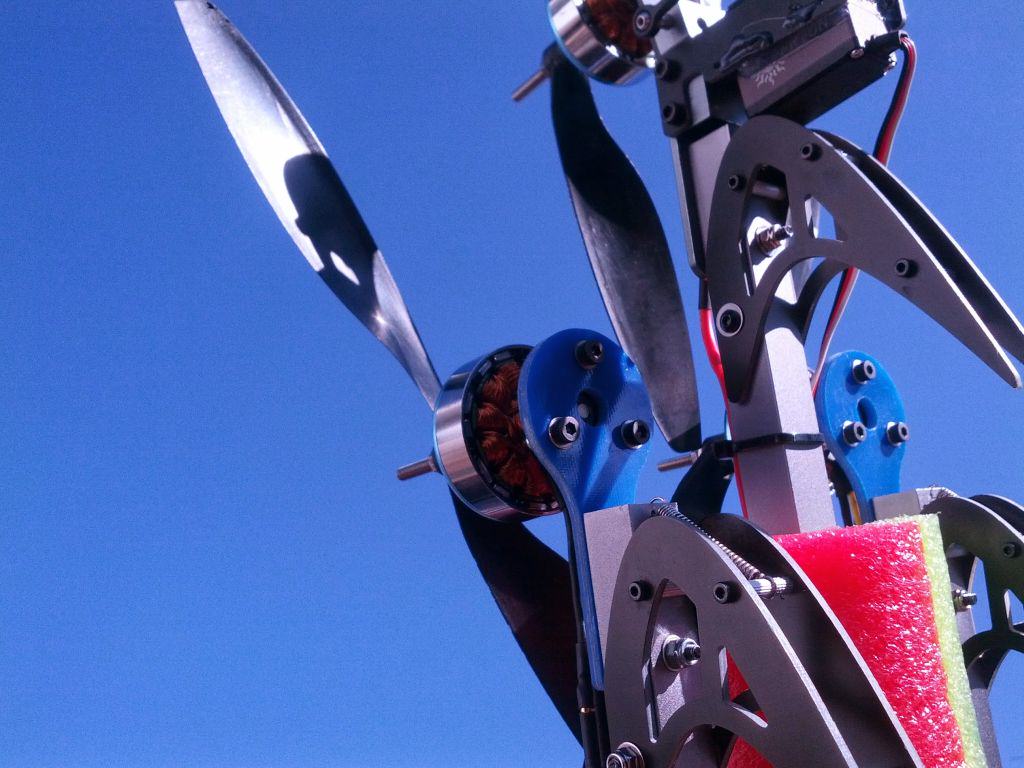
Here are a couple of photos of the new motor mounts. The new mounts are 1mm thicker than the original, but I think they’re still quite capable of breaking off in a crash and saving the rest of the frame from getting destroyed. Either way it’s a $30 frame so if you’ve broken a motor mount and don’t have a way to make a spare, just buy another frame and use it for parts.
Leave a reply to Repairing Turnigy X900 Tricopter – Motor Mounts