Work continues on the cabinet for the large switch mode power suppy (SMPS) for the big argon laser I’m working on. In the last couple of weeks since my last post I’ve done a lot of work in getting the old HP cabinet cleaned up, painted and new equipment installed. This is a mega-update for a couple of weeks of work, so there’s a lot to see and download. I put the images in progressive load mode, they’ll ‘rez’ in more the longer you look.
If you remember from our last episode when we last left our cabinet, it was looking something like this.
And it originally looked something like this, in all of it’s ugly glory (Sorry HP lovers) and had that funny old electronics smell.

I spent a while trying to decide on the color for the cabinet. I was thinking of doing it as a hot rod red, or a nice black, in the end black won out. I checked into a few painting options, such as powder coating or having an automotive shop paint it, but I didn’t have a big enough oven to bake the powder coat, and I didn’t know anybody to get it painted in a shop. As handy as spray paint is, it just makes a gummy finish that can’t really take abrasion and use very well, even after many months I’ve never had a normal spray paint become a hard surface.
Fortunately a friend told me about a 2 part paint product. It’s basically automotive paint in a rattle can with a very slow catalyst. When you’re ready to paint, you push a button on the bottom of the can which causes the catalyst to mix with the paint, and then you shake the heck out of it and go to town.
The product I bought is Rat Rod Satin Black from eastwood.com and it worked out pretty good. The spray pattern is pretty nice as well, much better than a normal rattle can. It’s about $25 a can, but it’s awesome!

When you’re spraying this stuff you should wear eye protection and more importantly a respirator, you don’t want to be breathing the V.O.Cs that this stuff puts off like most spray paints, and you most certainly don’t want to be breathing the mixture of paint and catalyst! This is really important to adhere to. Get a good mask if you use this stuff on a project.
That aside, it’s really worth the investment. I pulled all of the panels off of the case and scrubbed them down with acetone which got most of the grime off of them and de-glossed them a bit, and then I used a green 3M sanding sponge pad to finish up deglossing the panel and prepping it for the paint. I did not use any primer for this.
Click to enlarge these photos and see how the Eastwood paint lays down! I’m not sponsored for any of the products, so if I’m gushing over them it’s because I really do like them. There’s another brand called SprayMax which gets similar reviews so feel free to check them both. There’s a guy who does custom color mixes for SprayMax on eBay, he’s located in Washington State, Eastwood is in PA and shipping was super fast. SprayMax is also available in Europe I believe.
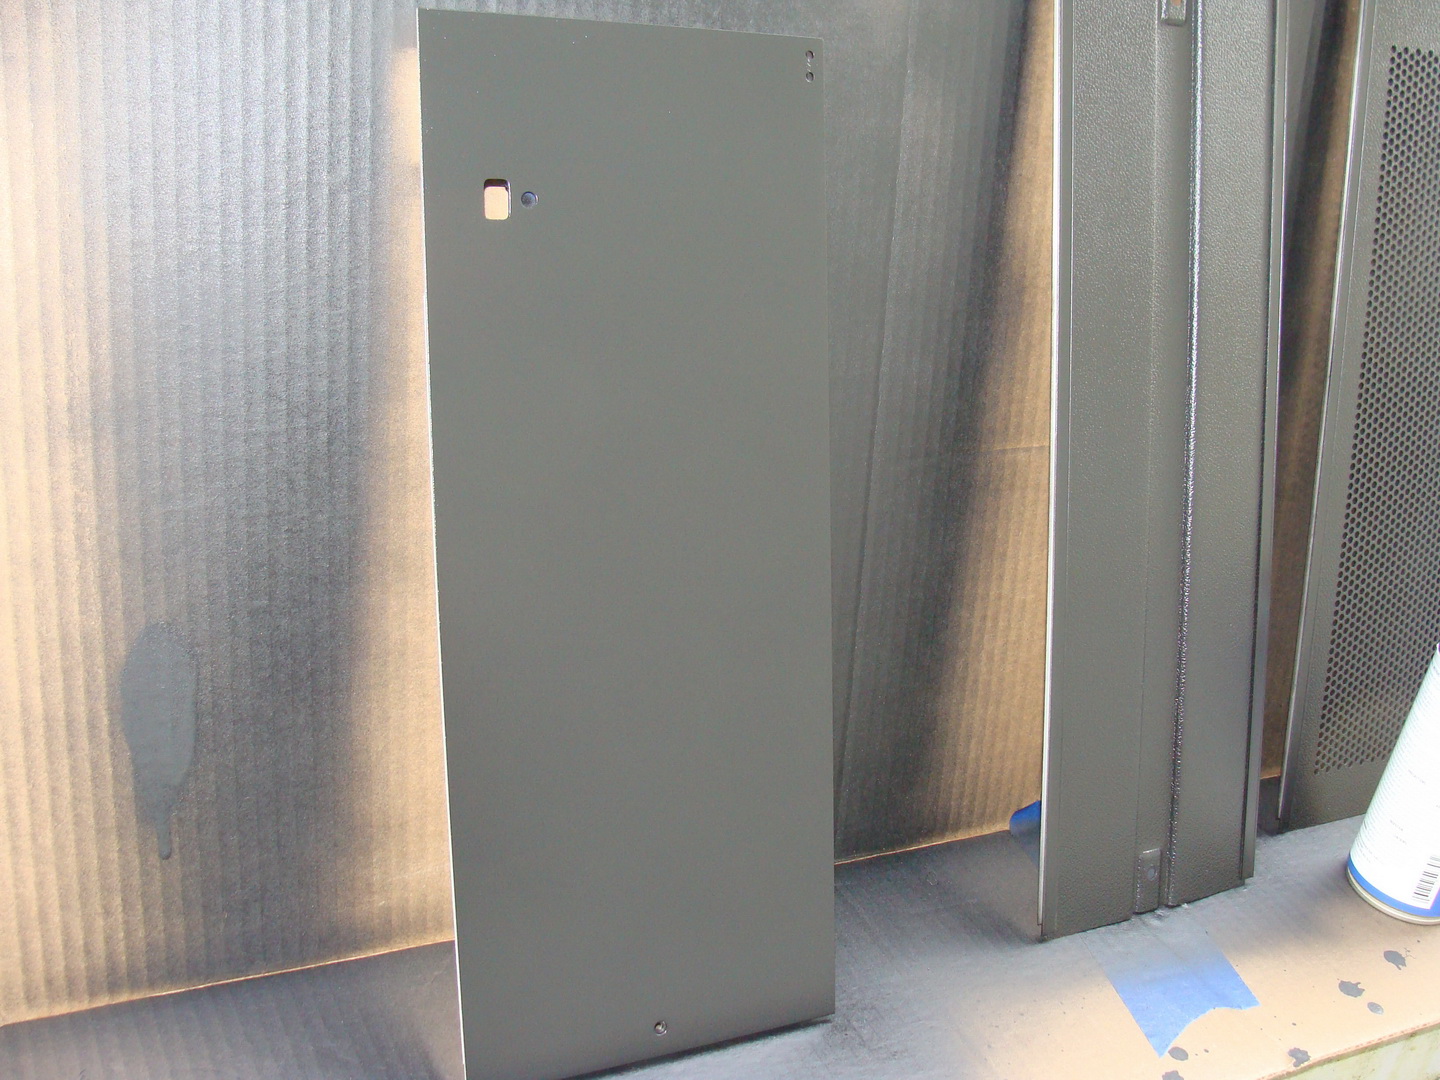
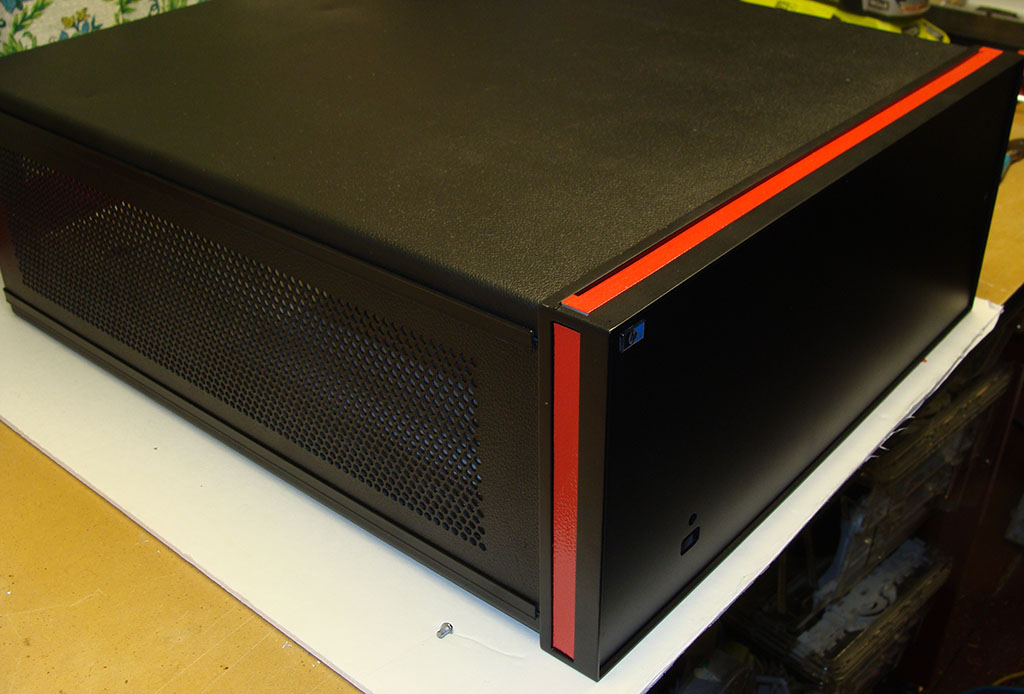
From this angle it looks very flat, but I promise it’s not

Here you can see my reflection in the satin finish

The original texture of the cabinet shows through the paint

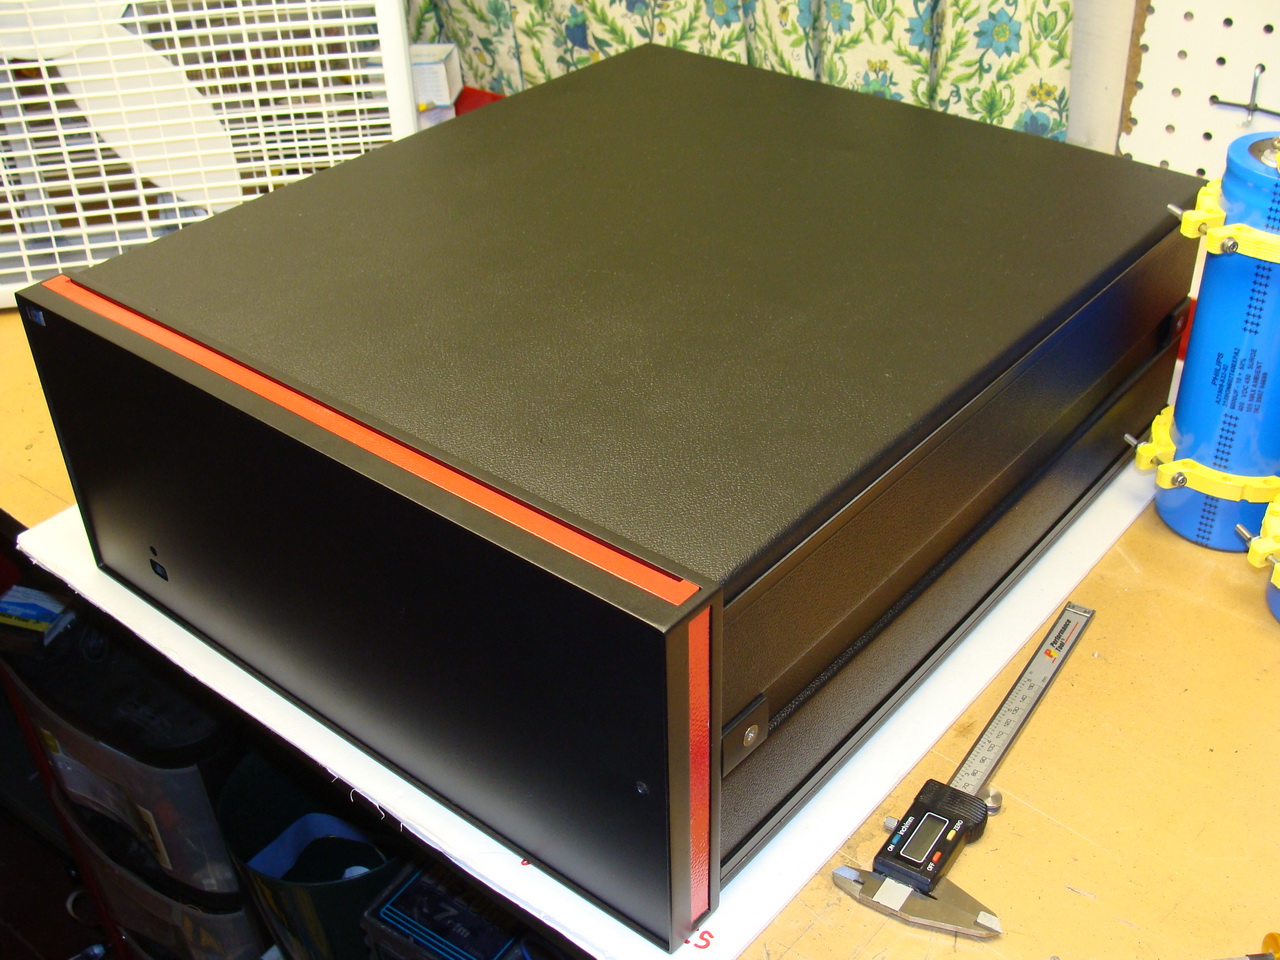
Side panel a bit further back

This vent grill turned out really nice
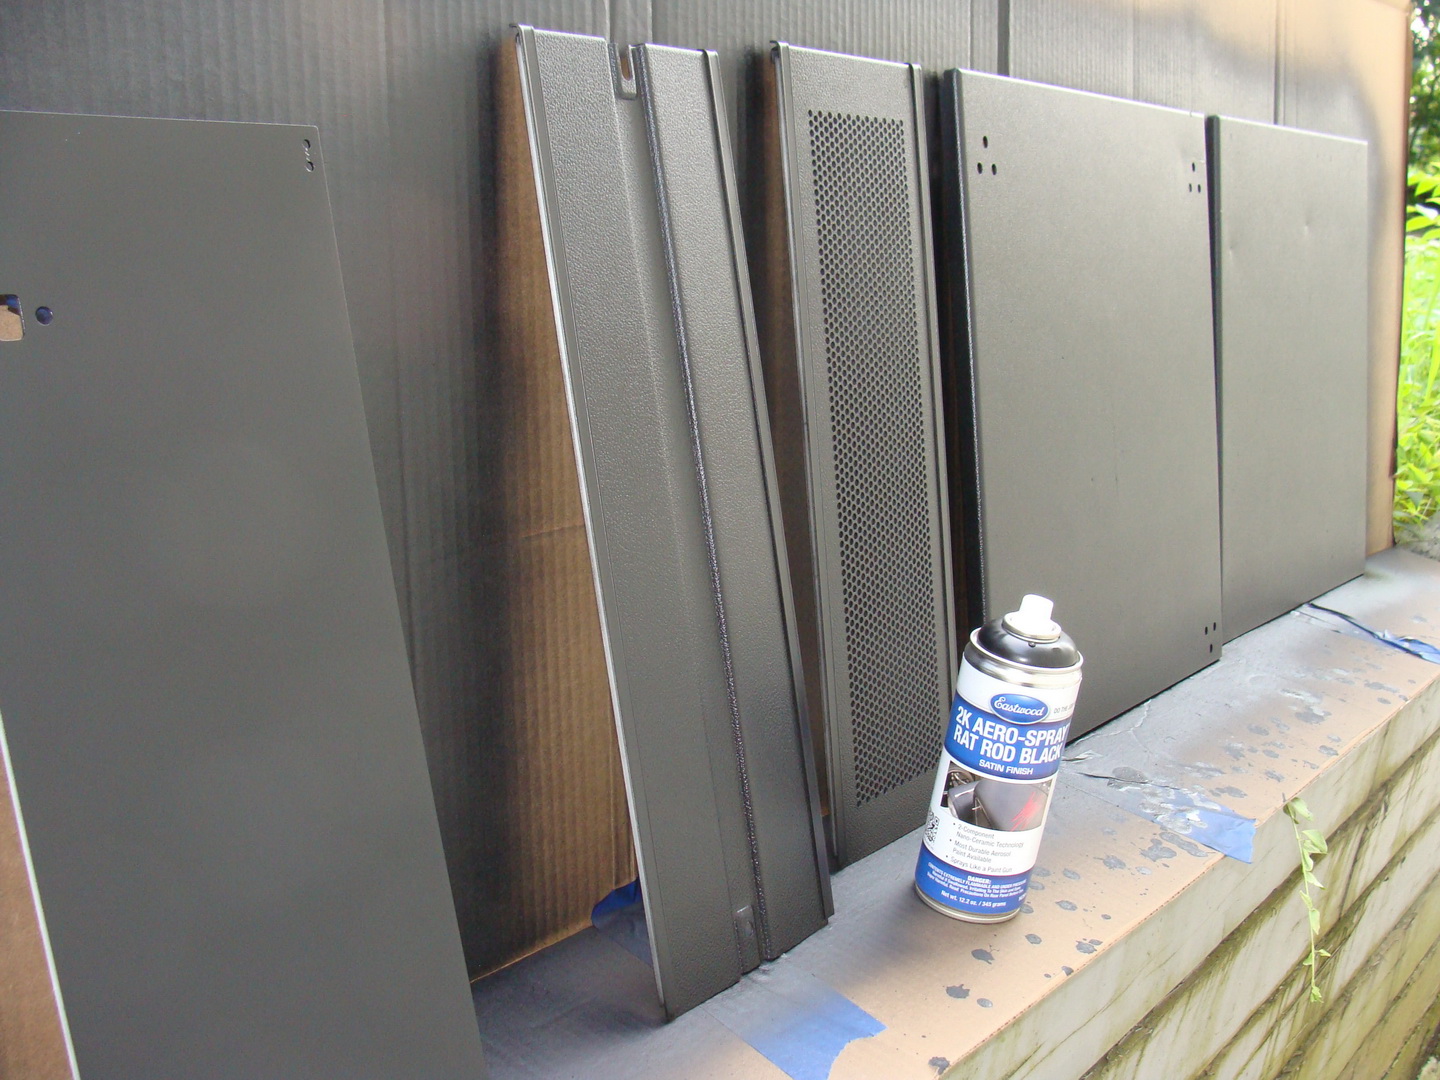
Painted outside in a slight breeze with a respirator, glasses and gloves

So that’s what things looked immediately after painting. I also painted the trim in a nice bright red paint, standard spray paint for this one, it turned out very nice, I think, please let me know if you like the scheme, if you don’t I don’t want to hear it 😉

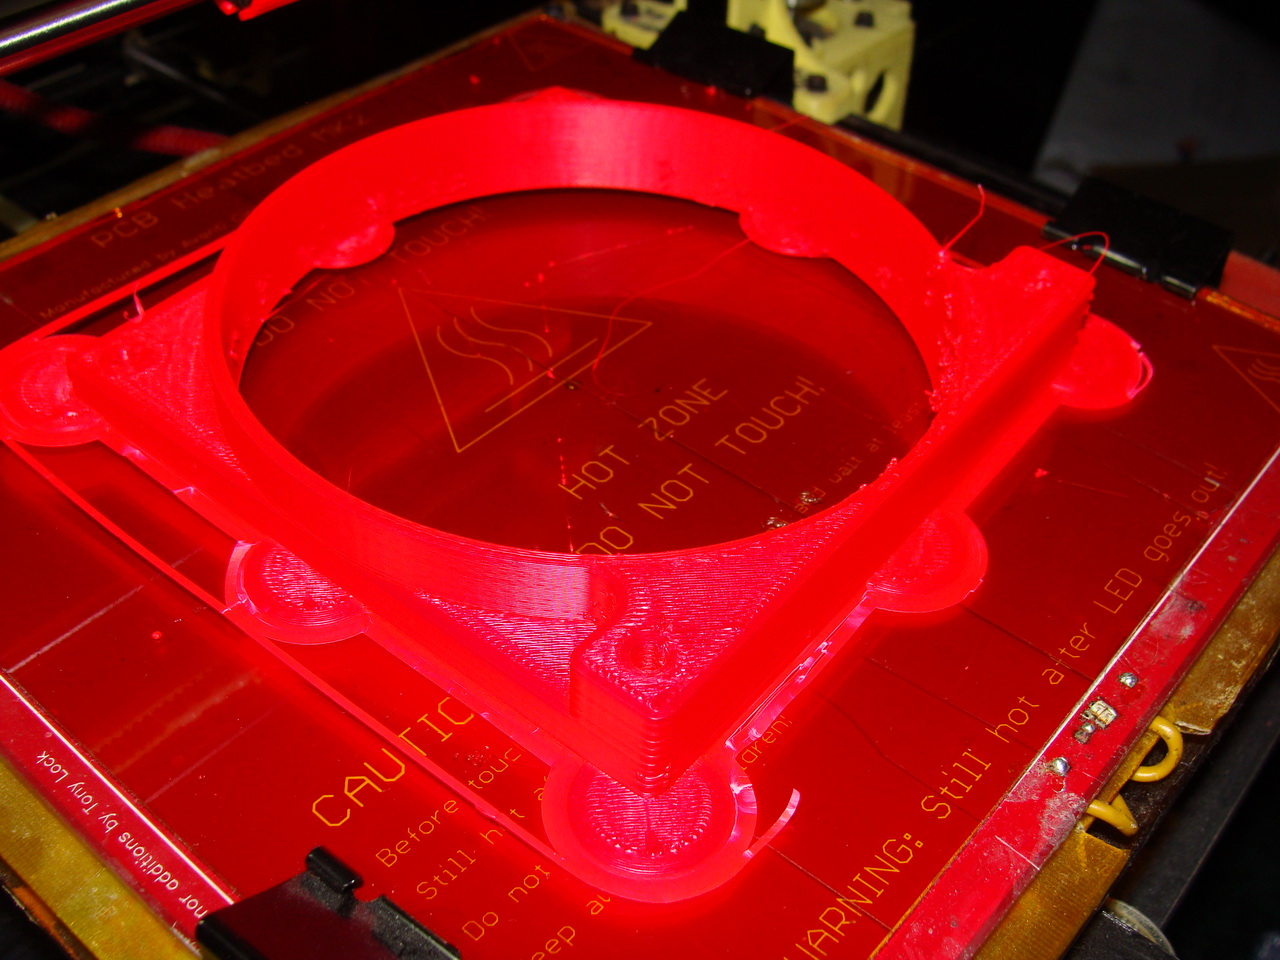
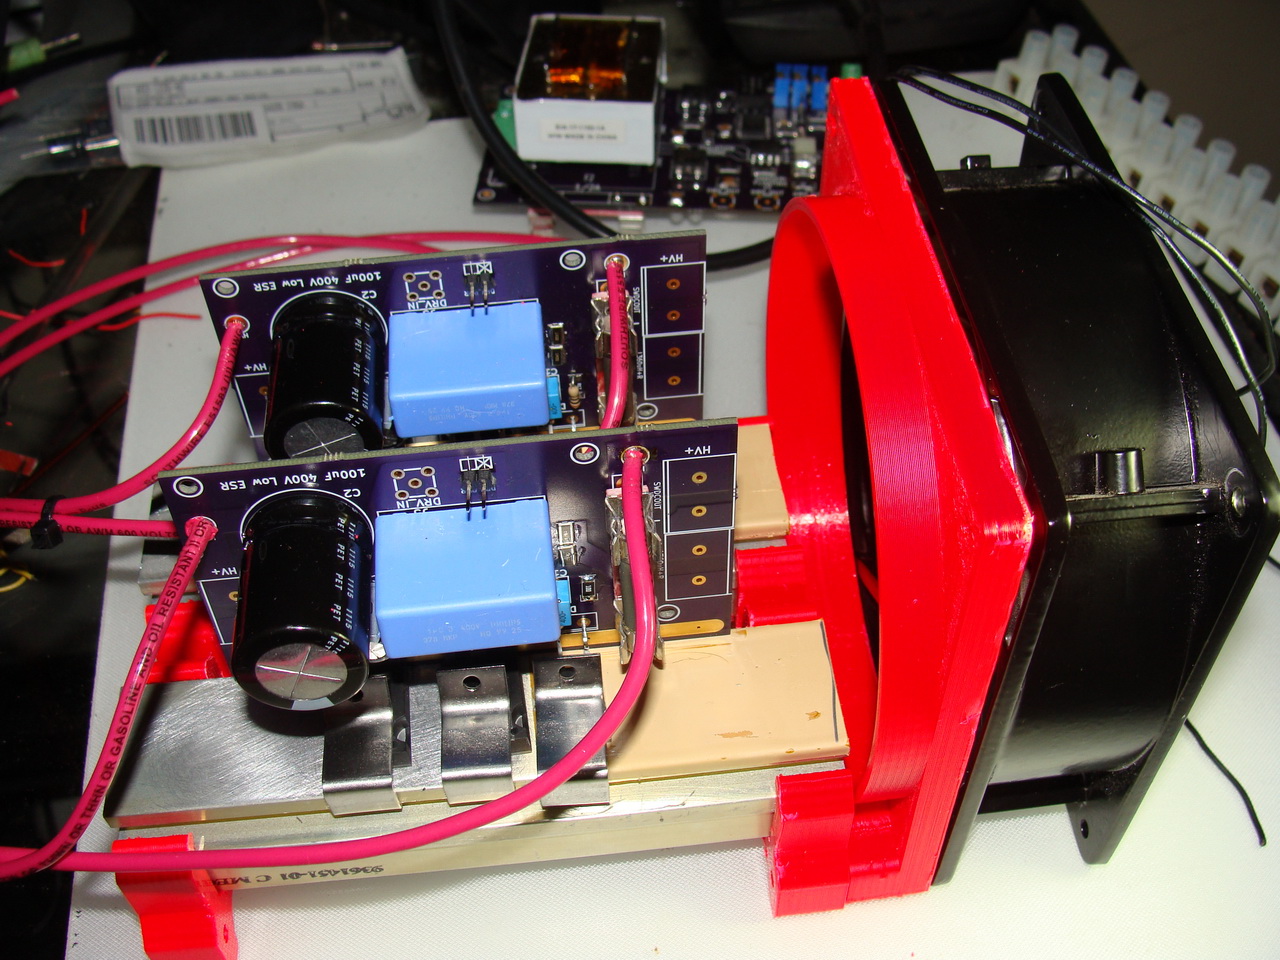
Of course now that I have a cabinet, I need to get stuff ready to put in it. The power driver MOSFET modules have a possibility to generate a lot of heat, though the original designer of the circuit said it wasn’t too crazy. I didn’t want to take any chances so I printed up some brackets to hold the power driver MOSFET modules in front of a powerful fan. Here’s some of the stages while printing, and the final result. Click on the photos to enlarge, the fluorescent red ABS is hard to photograph, it has a weird glow to it 😉


And the final result, an assembled pair of power driver MOSFET boards and fan assembly, yay!
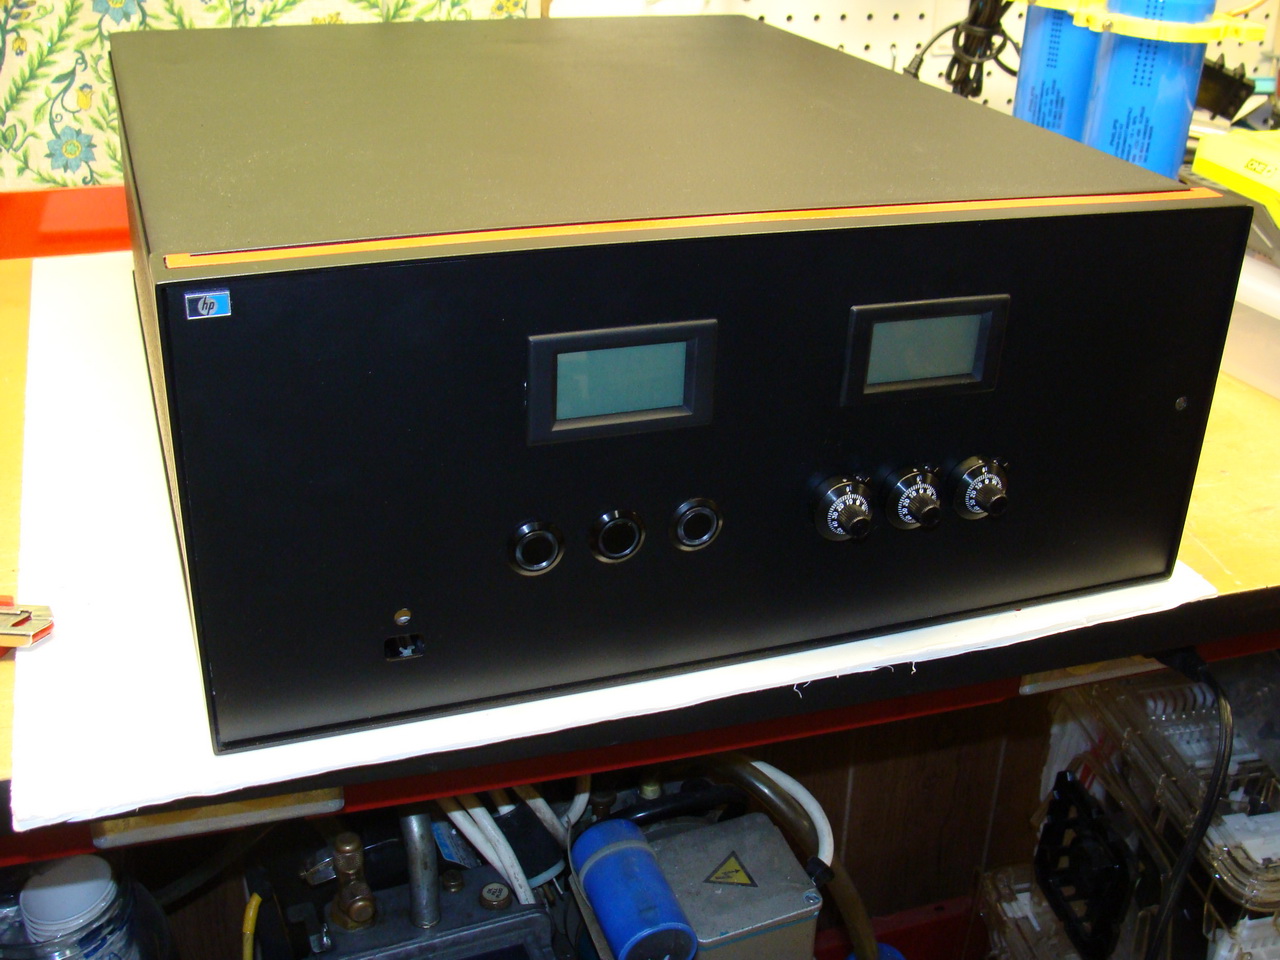
With that complete, I needed to get the dials, buttons and knobs in the front panel. If you read my Sneak peak of Log 5 post, you probably saw those already but they’re going to be listed here as well.
For the front panel I drew up the design in Adobe Illustrator and cut out all of the sections on the CNC machine.
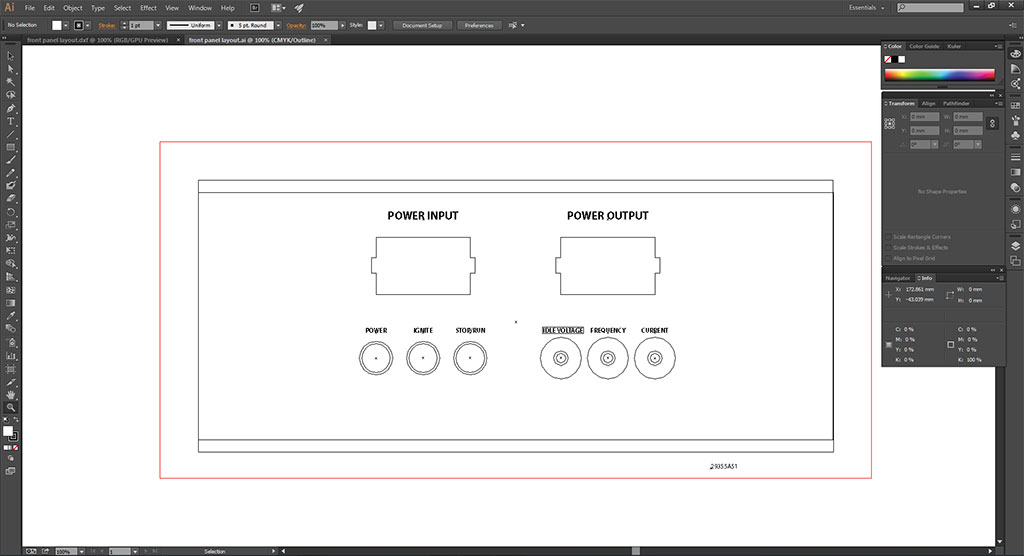
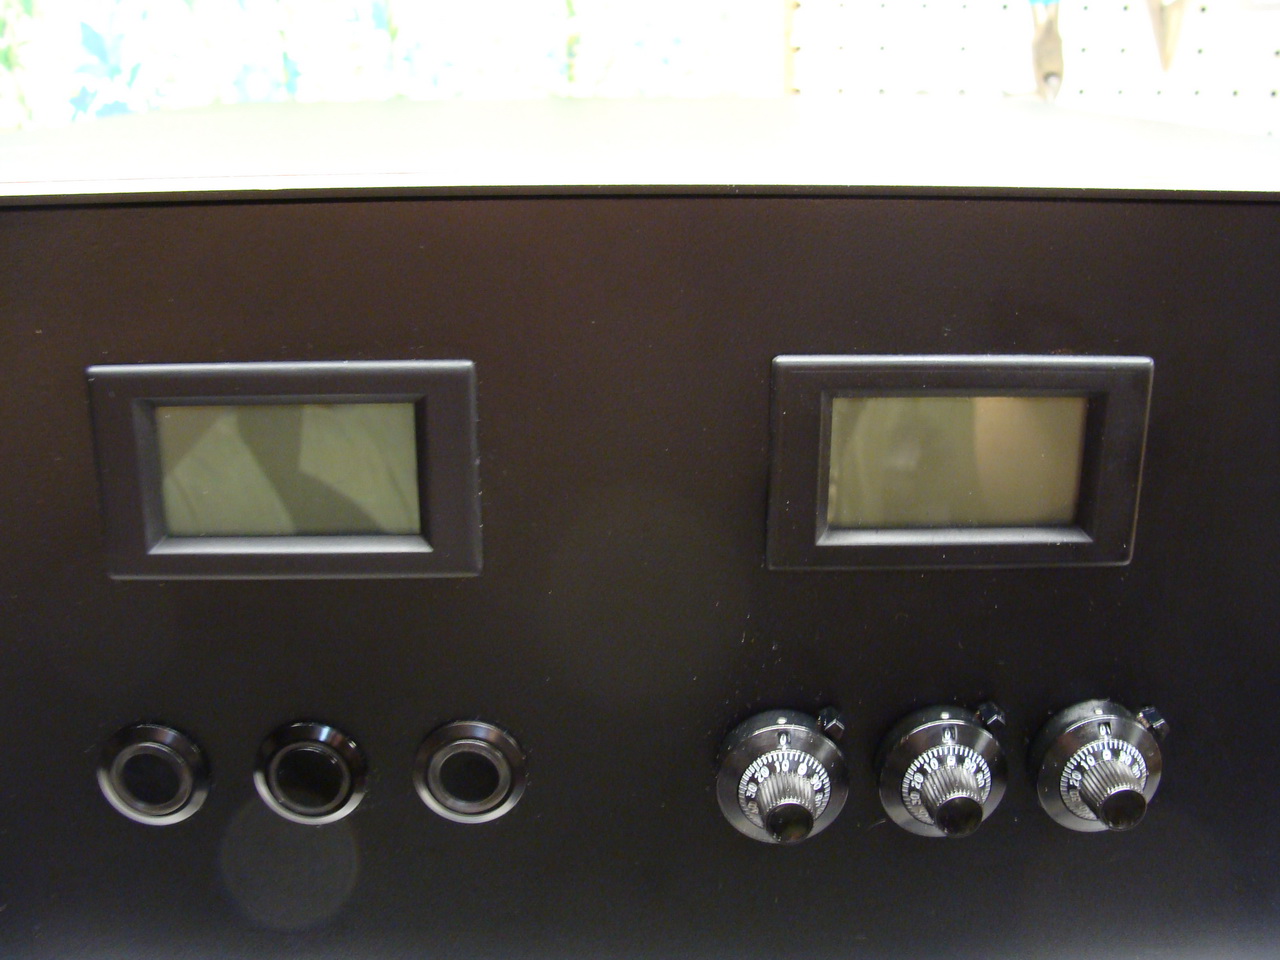
I didn’t get any picture of the CNC cutting, but I had some problems to start, the aluminum is not of machinable grade and is very gummy, it gummed up several of my smaller bits relatively easily and was just mayhem. You can see the paint got slightly burnt around the right panel meter hole!
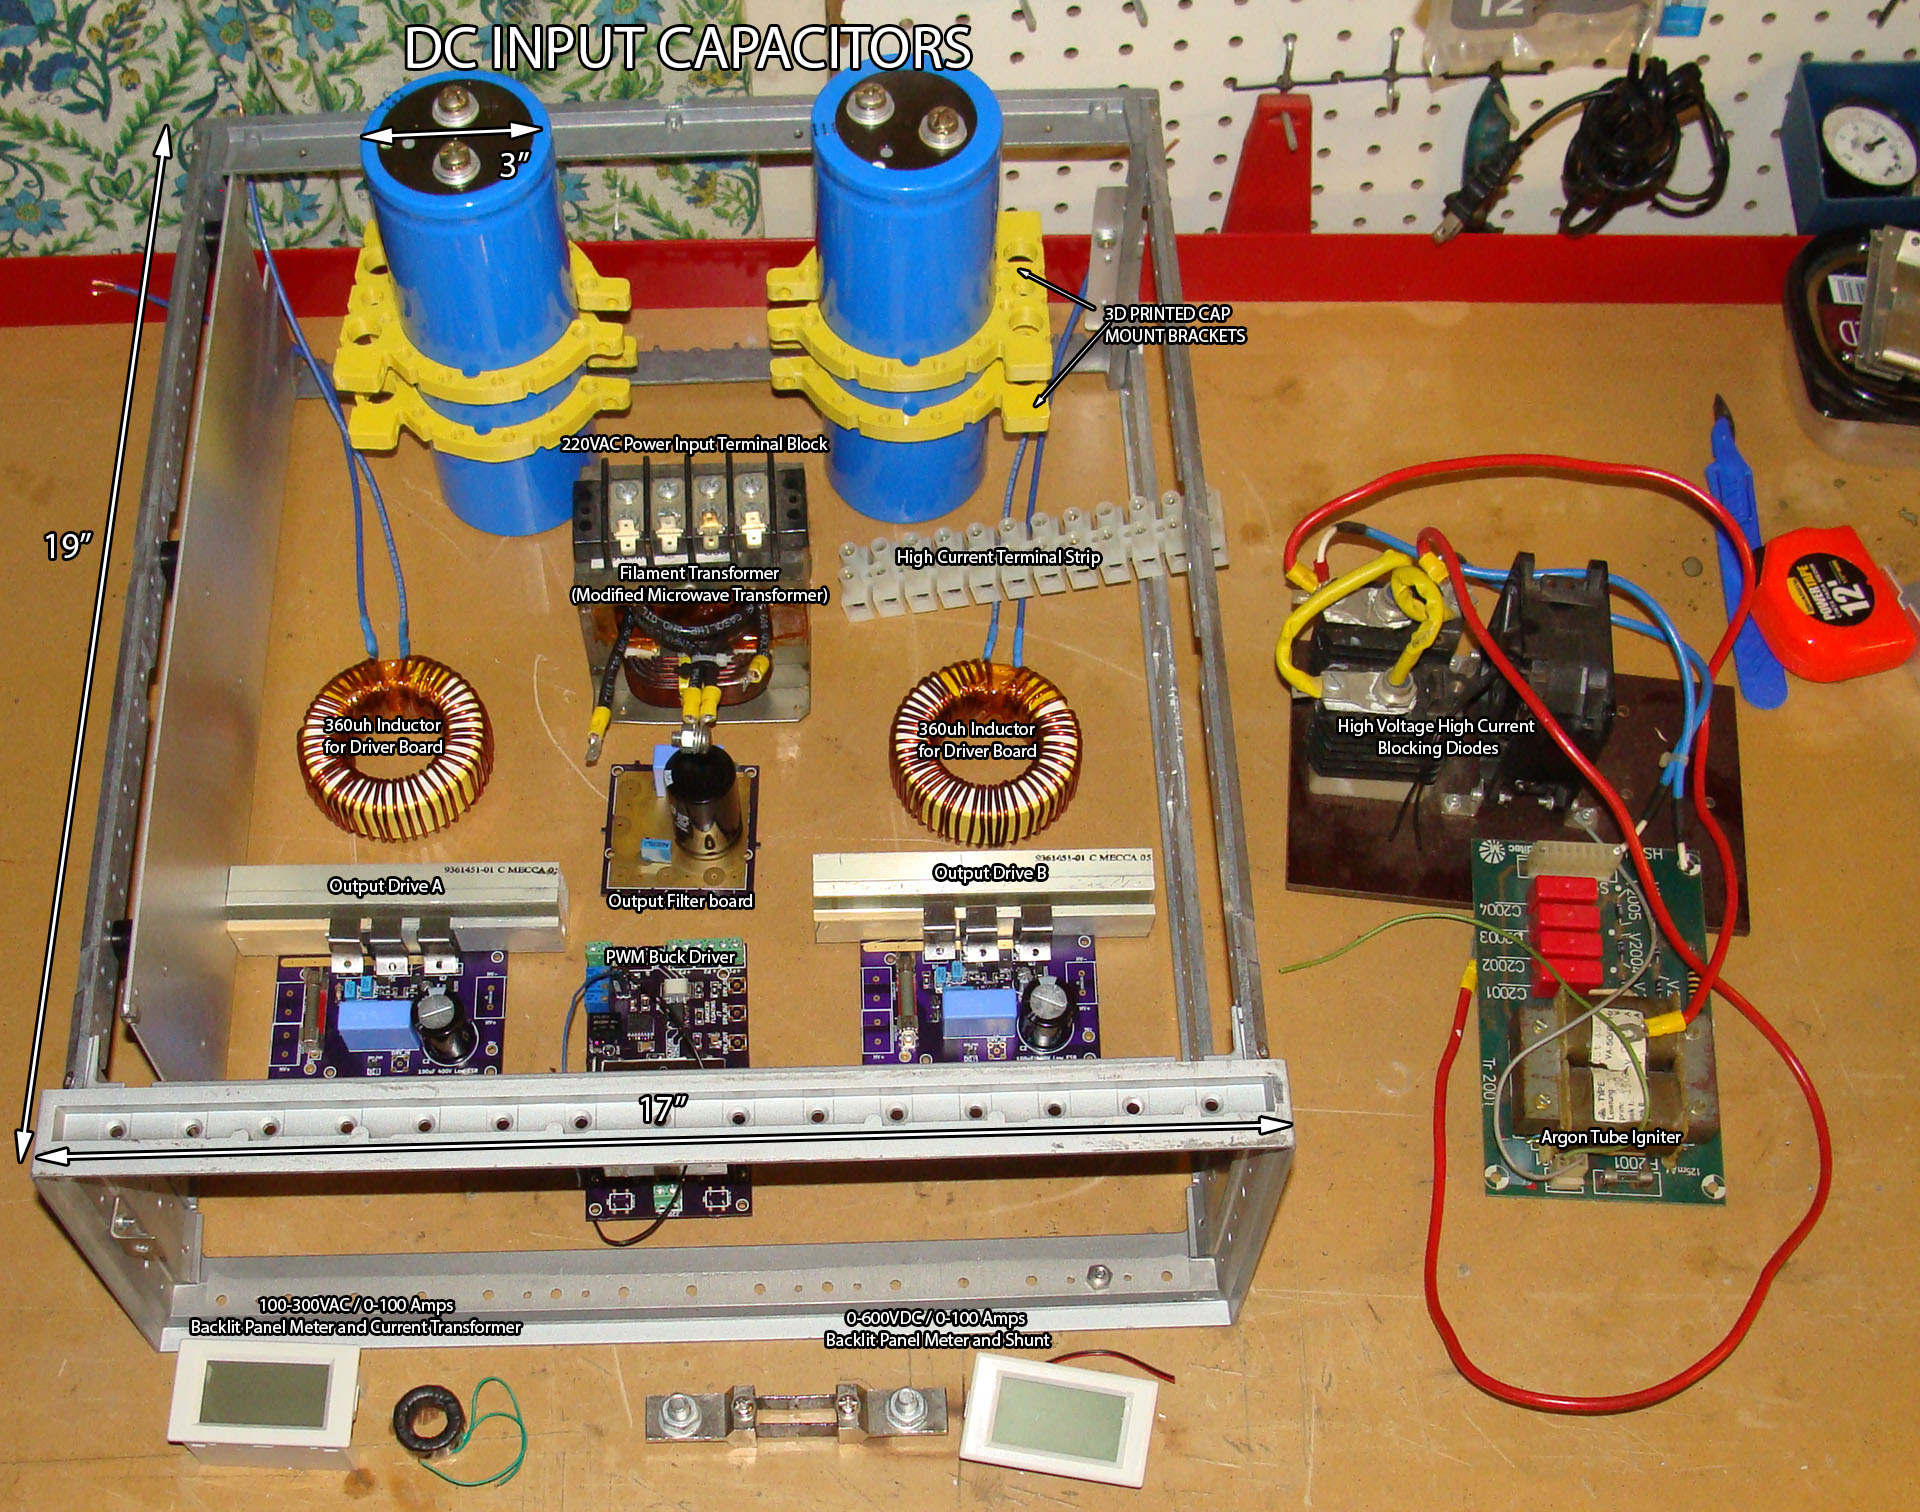
Once all that was taken care of, I added in the LCD displays which I mentioned in Large Switched DC Power Supply For Argon Laser Log 2. These displays show the AC voltage and current, and the second one shows the DC voltage and Current. The DC meter will be connected to the DC output of the PSU to measure real values, I just wonder how it will handle the switching noise.
I also added in some really nice Vishay-Spectrol 11-Turn potentiometer dials. I’ve always loved this style of dial and going for 3 of them was a big goal since they’re expensive, and the 10 turn 10kOhm potentiometers they attach to are expensive as well. Due to a bit of luck I was able to get these dials, and I’m really happy with them. I got the dials from Newark Electronics, they have a bunch of different types, but of course I had to get the black ones with the white text, in case you’re wondering more about them, you can find them here Vishay-Spectrol 11A21B10 Counting Dial, 10 Turns 0.25 Inch.
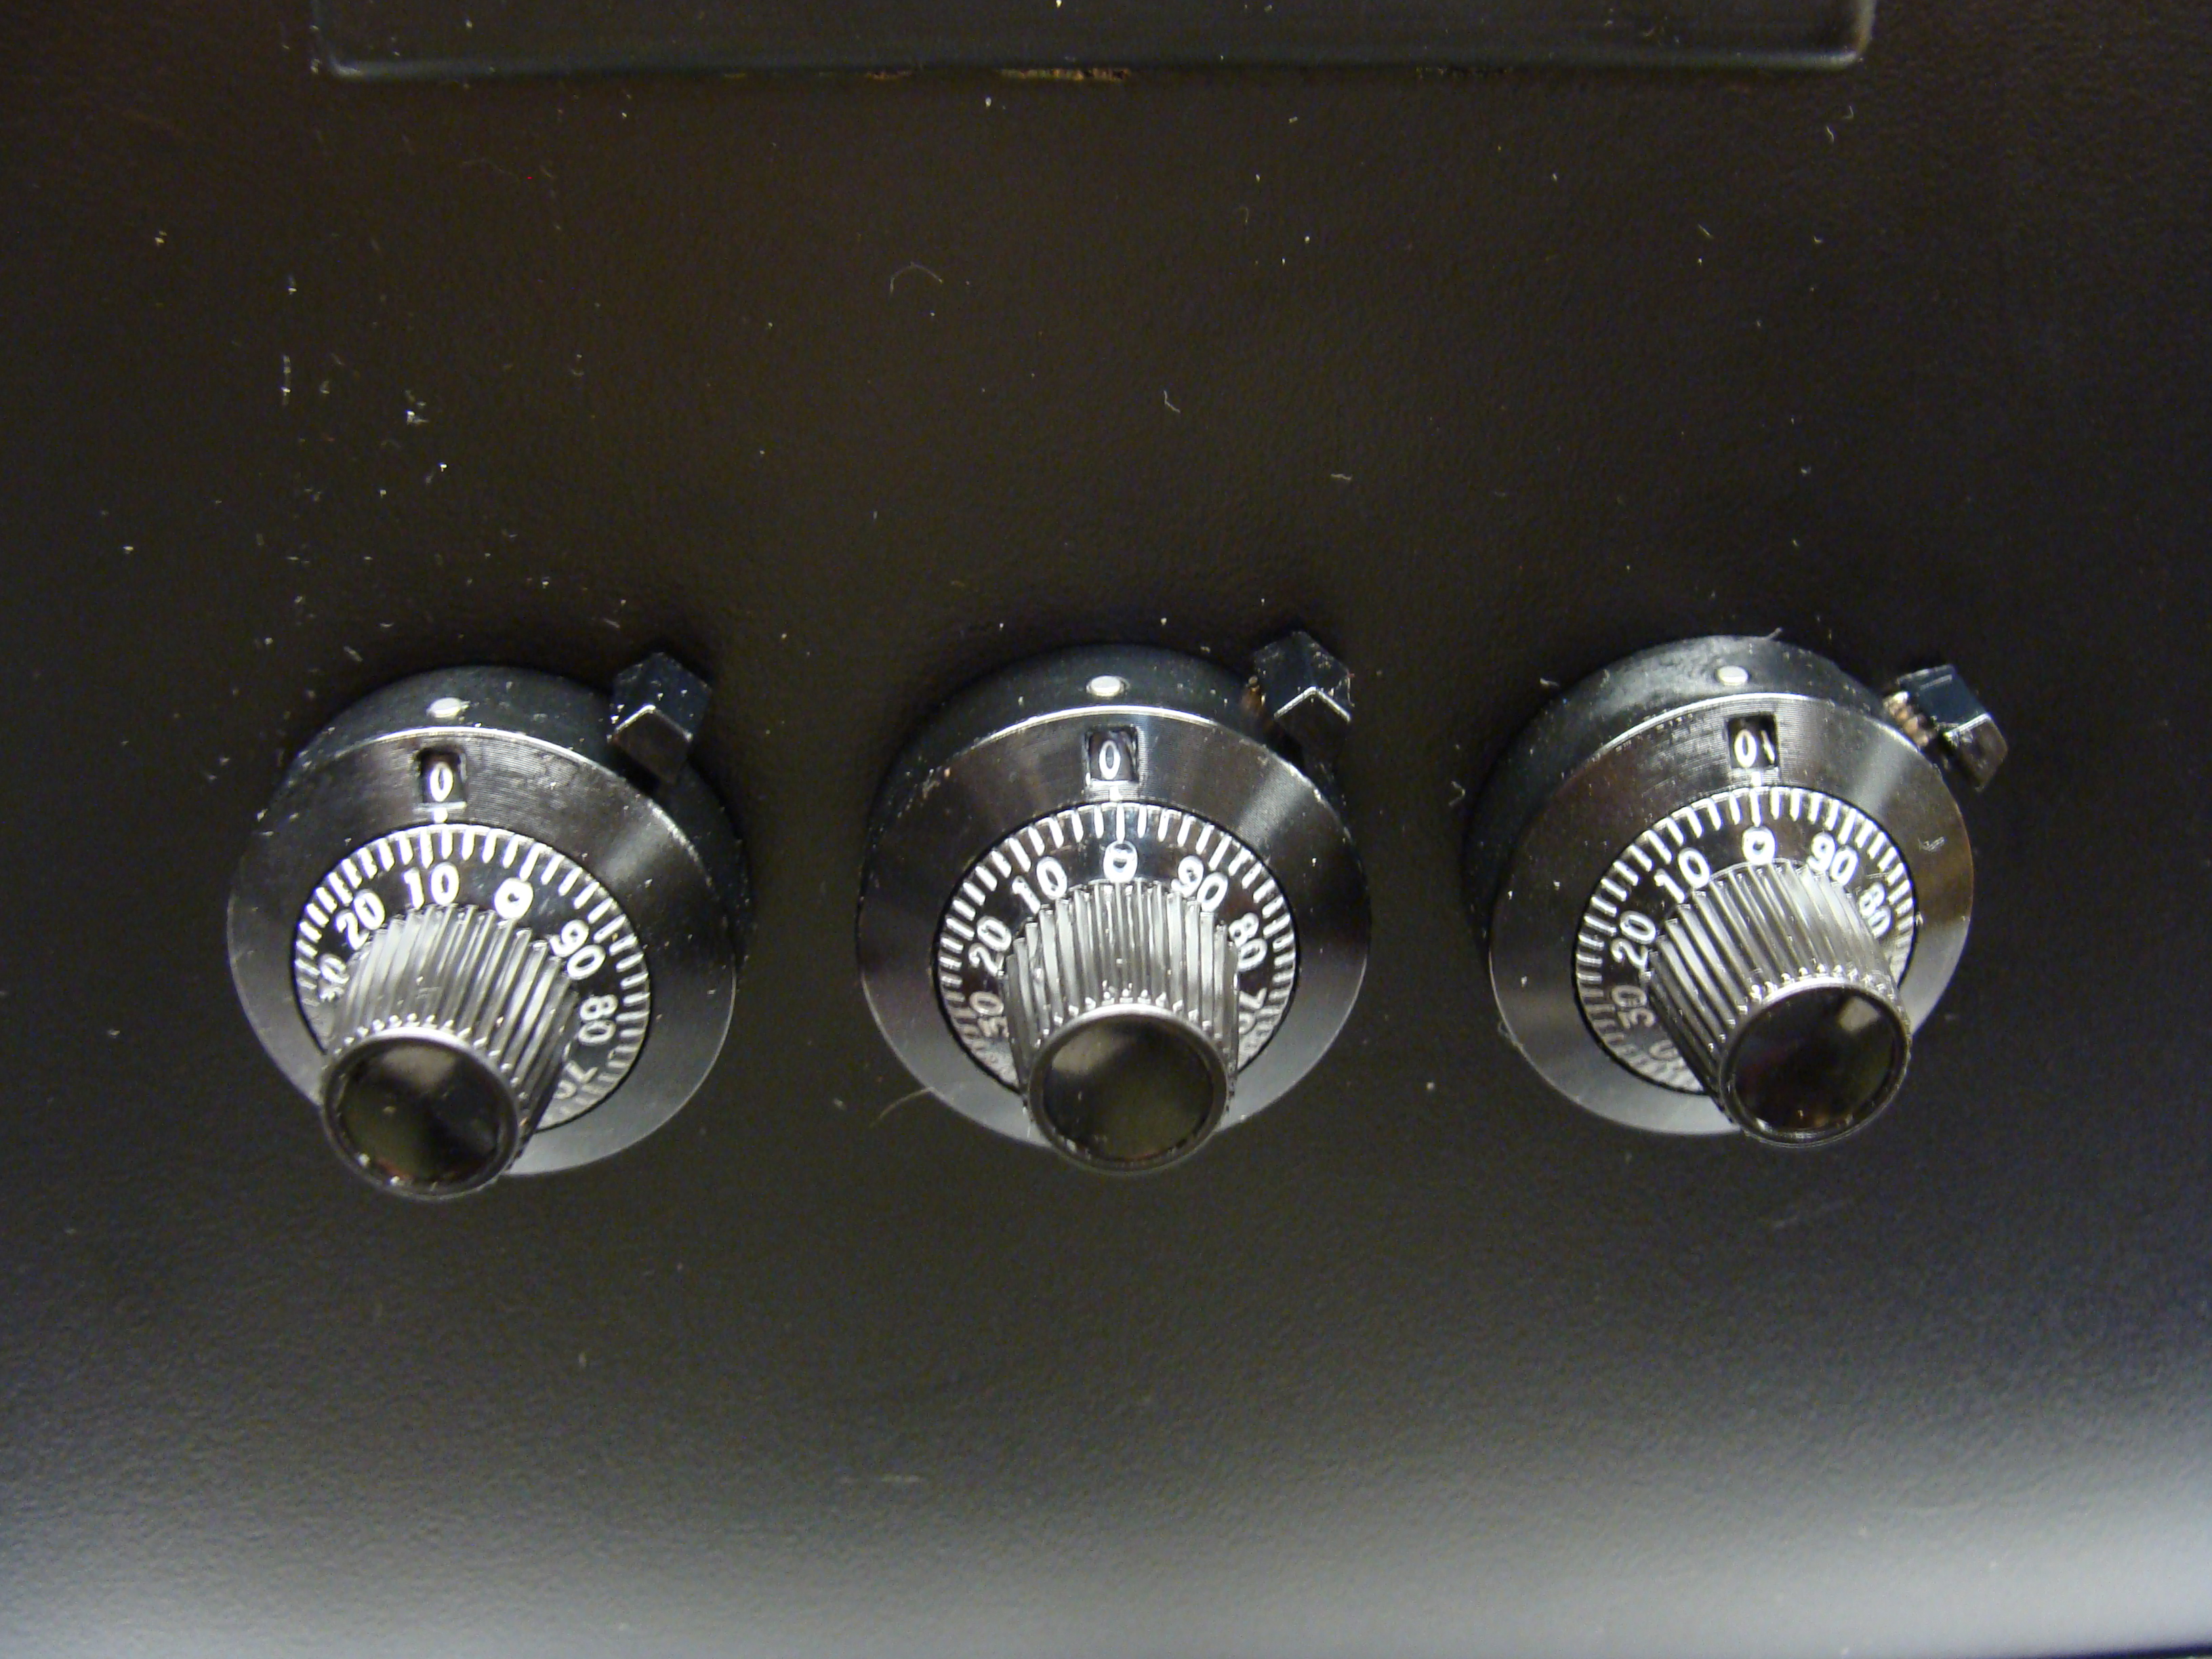
The dials will be used to control the idle voltage, PWM drive frequency and the current limiting, from left to right.
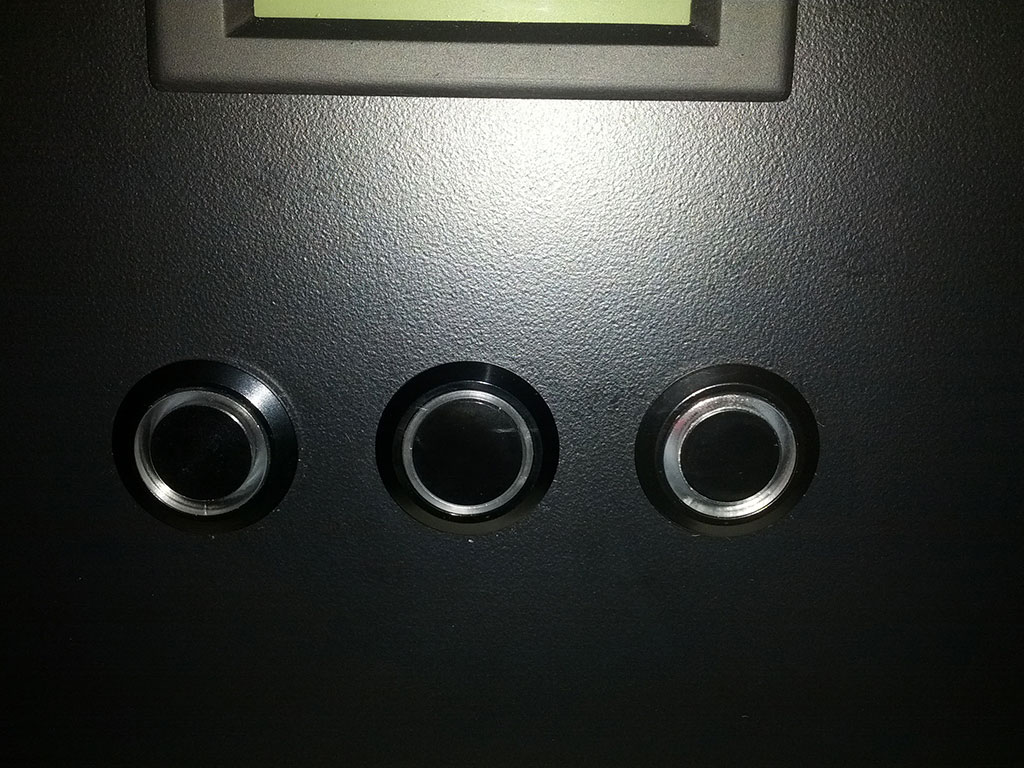
I also added some vandal switches, they should have all looked like the middle one, but they don’t and the PC modding supply company I bought them from only has mixed inventory and can’t fix the problem so I’m going to stick with the switches as they are for now.
Overall, aside from a couple minor things, the front control panel looks pretty cool.

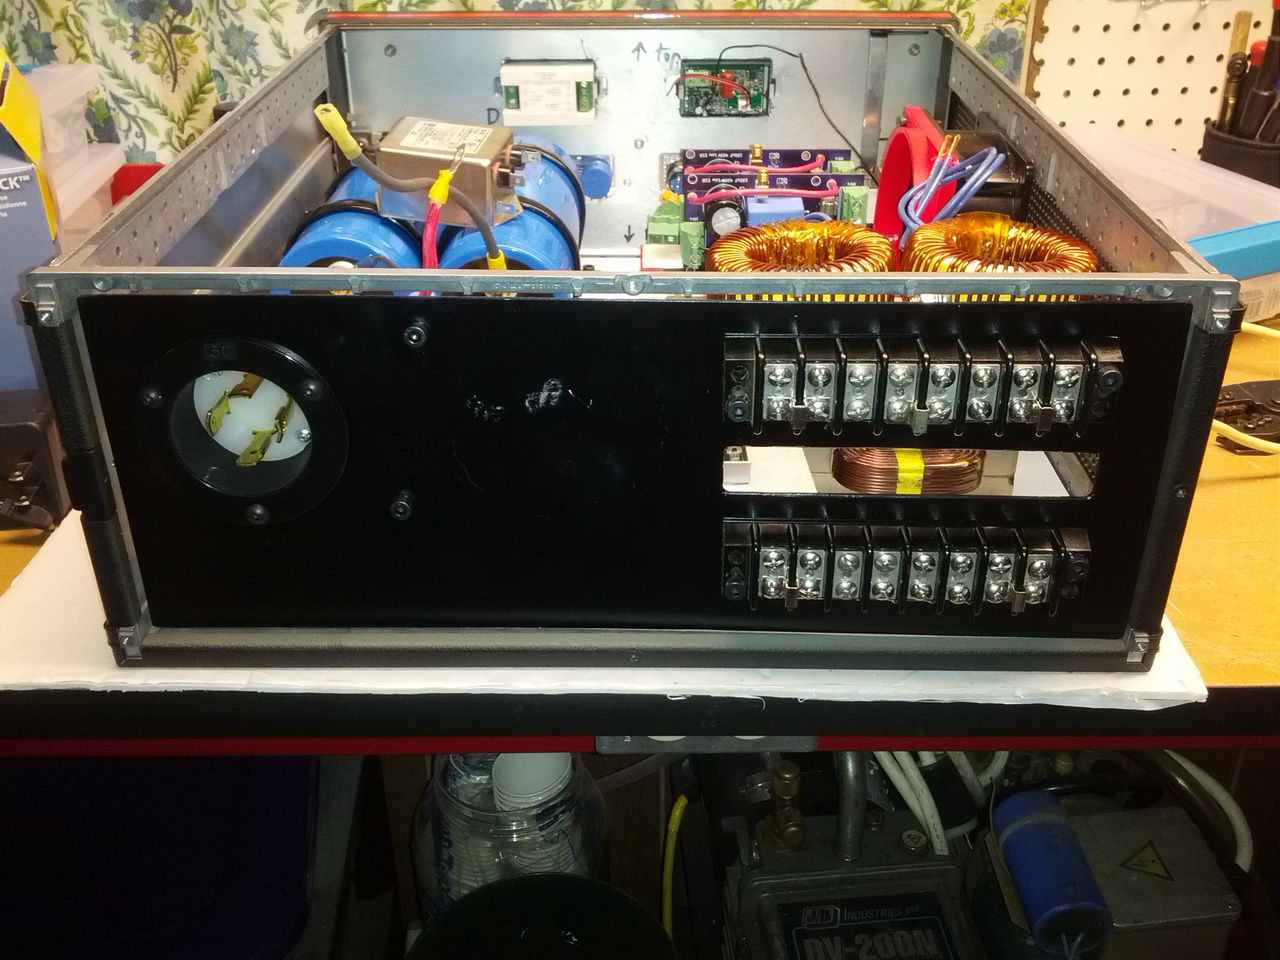
I also machined the back plate and added the connectors. The argon laser head will connect to the terminal strips, and the power lines and auxillary lines will come from inside the case, through that hole and onto the terminal strips as well. The big power connector on the left is the L14-30R power connector. It consists of 2 hot lines for 230VAC +/- 5% , one neutral line and one ground line.
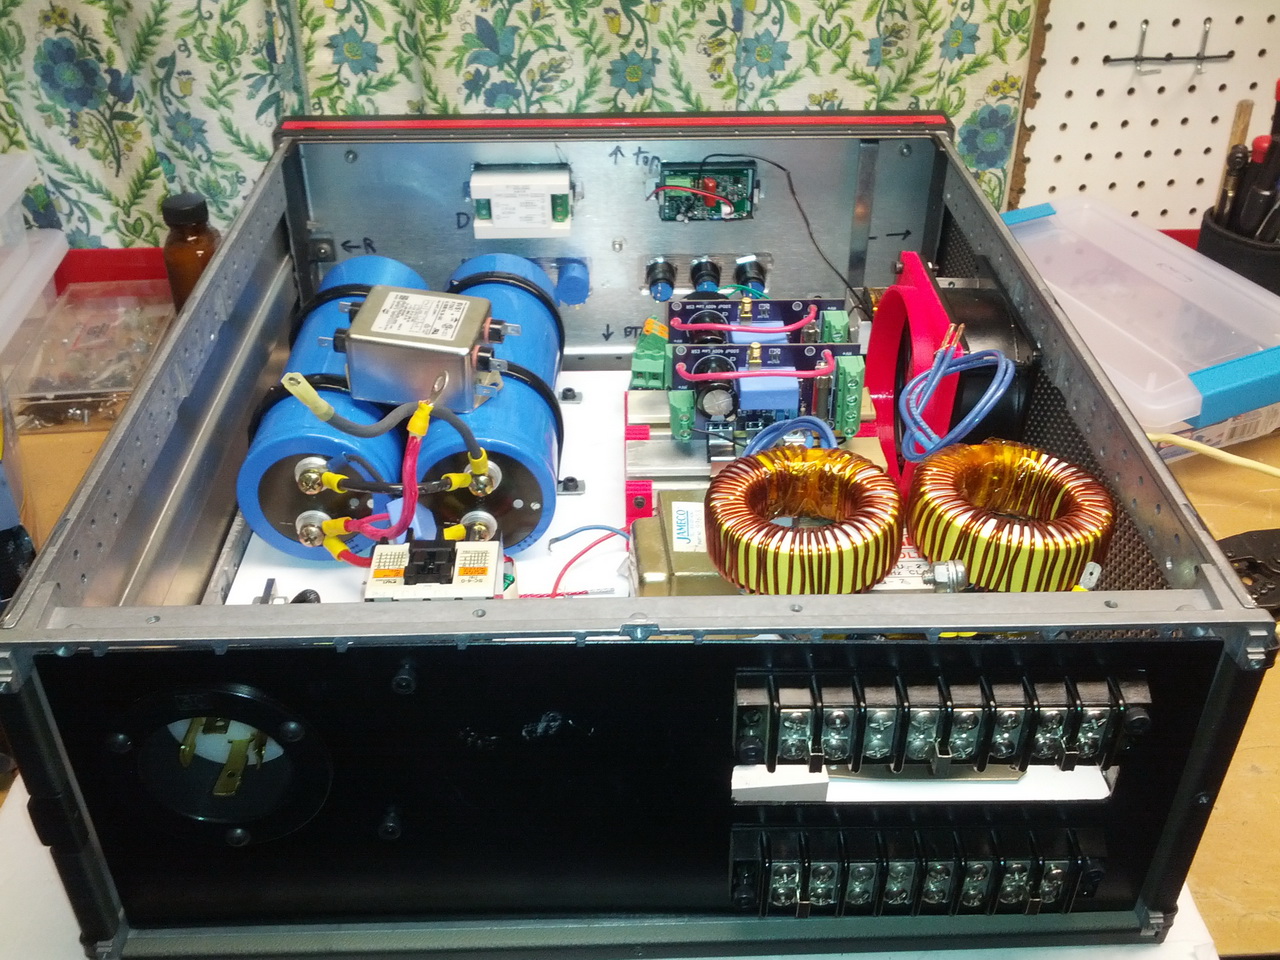
I feel like I’m getting so much closer to the completion of this DIY switch mode power supply project, but there’s still a long way to go and then once everything is connect I still have a lot of testing and analysis to do on the switching circuit to make sure it’s going to function at the full 4500 Watt load that the argon laser head is going to put on it.
That’s all for now, I have some other things happening but I will continue to push forward on this power supply project, I want to see some beautiful argon laser light sooner rather than later. I was just recently selected as a finalist for Newark / Element 14’s Forget Me Not design challenge, so I will be making some posts about that shortly.
As always, feedback is welcome as long as it’s casual and friendly.
Leave a reply to Large Switched DC Power Supply For Argon Laser Log 5 – Cabinet