
I didn’t have a ‘large project’ budget for 2013 so I decided that I would do something a bit more low key and convert a CNC router to a 3D Printer. I have been looking at 3D printers over the last few years. They looked kind of cool, but the quality on most filament 3D printers is not what I would call a finished look. They are good for prototypes though, small gadgets or for items where surface finish is not important to evaluate a concept.
I looked at a lot of different SOHO targeted and home made / DIY type 3D printers out there such as the Mendels, Makerbot and RepRap types and about a thousand variations and variations on variations and while there are a LOT of brands, models, makes, open source designs which seem quite capable of printing objects in 3D from plastic filaments, I just didn’t really feel like building a custom built unit when I wasn’t sure how much use I’d actually get out of the thing. Instead I decided to convert my existing CNC router to 3D printing and see how that went.
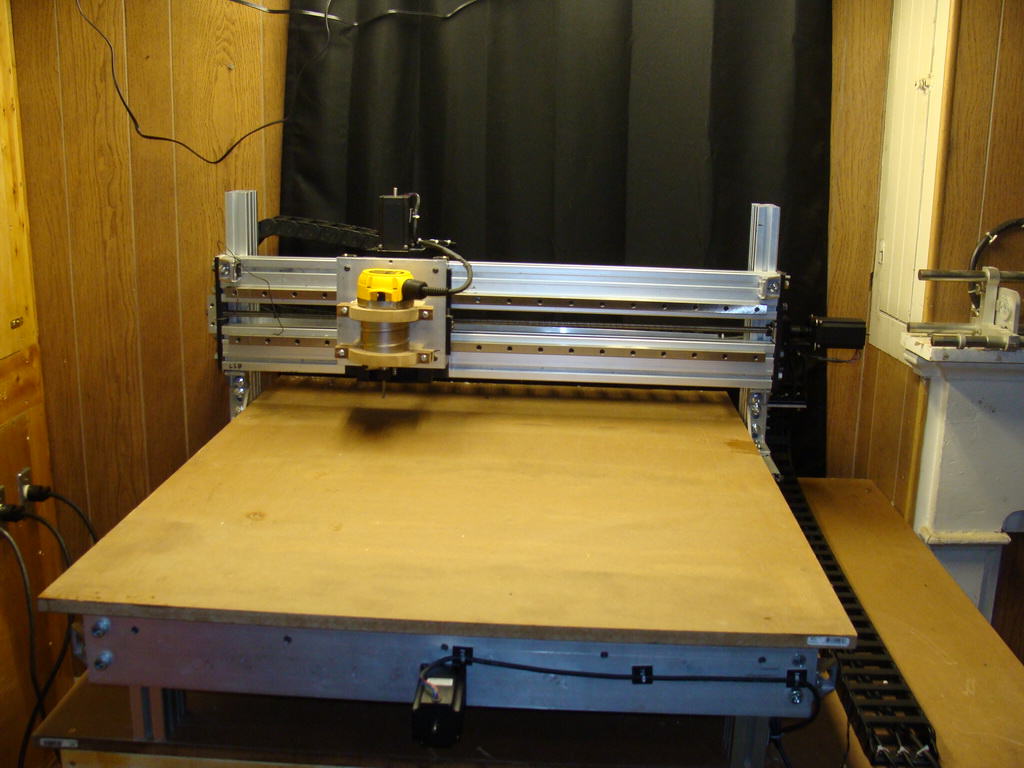
I built a CNC Router from scratch a couple of years ago. It’s a nice and very rigid machine with a bit over 2 foot x 2 foot working area, big stepper motors and very high end linear bearing rails. It originally had a Dewalt router for the spindle, but last year I installed a 2.2kW spindle onto it and it happily chews away on wood, composites and soft metals like aluminum.
Since I already had the motion system in place, a Gecko 540 4-axis controller, the real work was deciding on what I was going to use for a 3D print head. I read a lot of content on reprap.org about various print heads. I read a lot of posts on various forums about people’s own experience with various print heads and I did as much research as I could about the available printing materials; primarily PLA which extrudes at 180C-220C, ABS which extrudes at 215-250C and at even higher temperatures, polycarbonate at around 300C.
I decided to go with PLA filament for my first prints. PLA was the easiest material to start with in my case. It has low extrusion temperature requirements for starters and does not require a heated bed, either. One of the downsides is that it starts to get soft in temperatures as low as 60C so your 3D object may not hold up well in direct sunlight, on a home heating radiator or on the dashboard of a hot car.
After looking over a lot of extrusion head designs I ordered the parts to make a J-type hot end with some sort of gear driven cold end. The hot end is the part which melts the filament and the cold end is the component which drives the filament into the hot end to be liquified. The more common gear driven cold ends are mostly printed, but you can buy pre-printed ones on eBay or online stores if you don’t know someone with a printer or if you don’t have a working 3D printer at the moment.
I ordered parts to make a J-type hot end but ended up partly building a large MakerBot style Mk7/Mk8 extruder based on a NEMA 23 sized stepper motor with the help of a good friend. I finally ordered a QU-BD extruder. I had seen them marketing at MakerFaire in NYC and thought they were nice looking. I actually ordered the dual extruder, but I am keeping busy enough with just one of them for the time being. I also do plan to finish the NEMA23 extruder as well, possibly using it as an bulk infill extruder for 3mm filament.
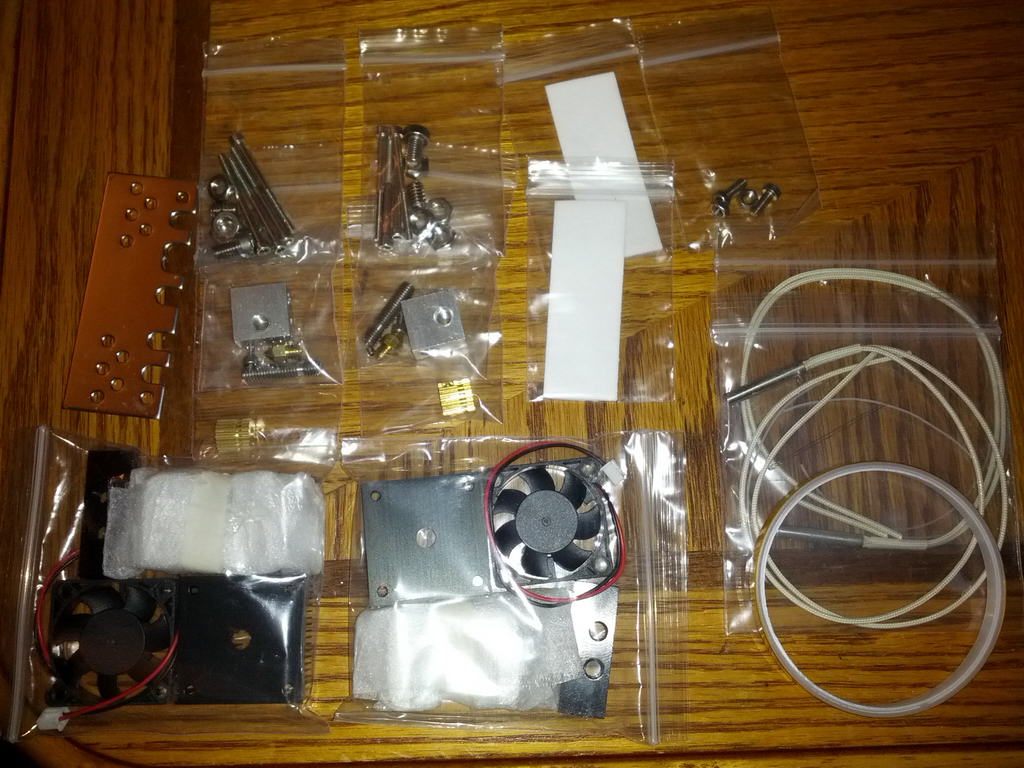
The QU-BD extruder was pretty easy to assemble, there’s only a few parts and they have directions on their website. They did forget to ship the grub screws for the filament drive gears, which are just modified pinion gears, but I had a couple of them in my screw bin. I’m sure QU-BD would have sent the missing part if I requested as their order fulfillment folks seem pretty tuned into that from what I’ve seen on various blogs and forums. Once the extruder is together it’s quite a compact module. You can see it below the PID temp controller in the next photo.
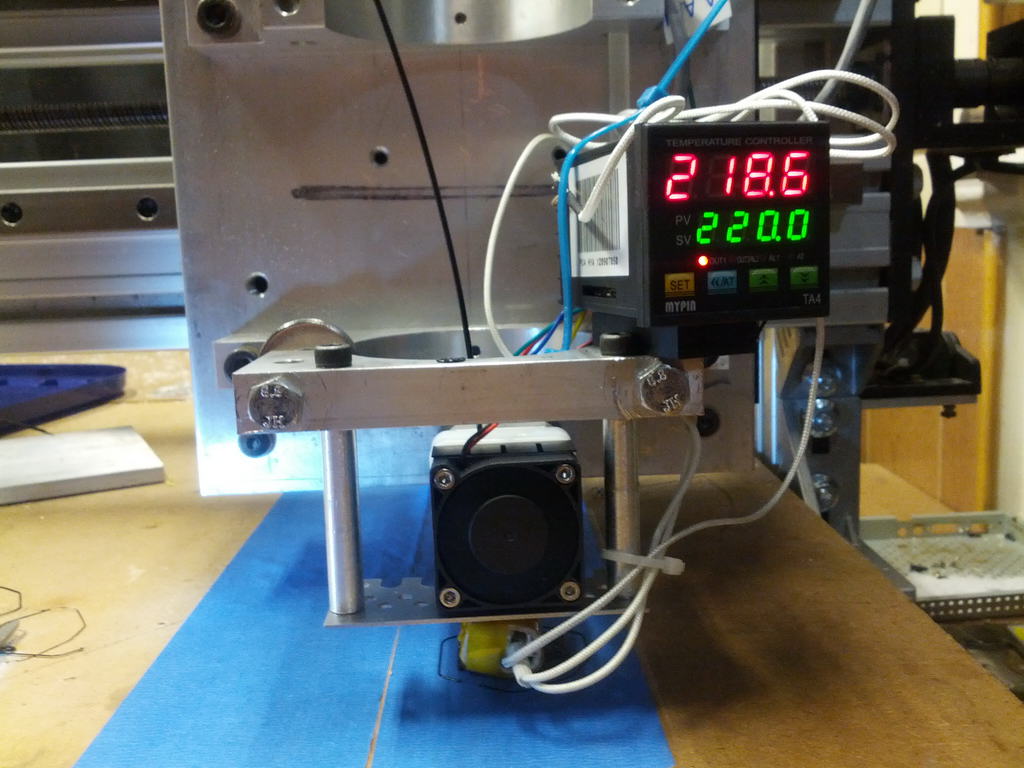
I had to do a couple of modifications to my CNC router to convert it to a 3D printer. I removed the 11+ pound water-cooled spindle and modified the spindle mounting brackets temporarily to accept the QU-BD 3D print head ‘universal’ plate. I then mounted one nozzle, for now, on the adapter plate and ran some extra lines for the new stepper motor (which was attached to the 4th axis of my Gecko 540 controller) and a 12 Volt DC line for the extruder fan, a 24 Volt DC line for the hot end heater and a 120 Volt AC line for the PID process controller which maintains the temperature of the extruder’s hot end. I’ve since removed the big aluminum mounting plate for the CNC Router and mounted the extruder head using some OpenBeam extrusion which I picked up at MakerFaire NYC and this removed another 5 pounds of weight from the x-axis (though the crossbar, bearing and drives still weigh about 35-40 pounds). I also added some LED lighting but need to add even more!

I firmly taped the thermocouple to the heater block of the QU-BD extruder’s hot end with Kapton tape and then wrapped it in the included ceramic material to insulate the hot end. QU-BD only provides enough ceramic insulation to go around the head in one axis so I stuffed a little extra ceramic wool (Inswool) into either end and taped it with Kapton tape to provide extra insulation to the heater block.
With all of that complete, the actual hard work began. The tuning and configuration of Mach 3 and the slicer software of choice. Tuning is perhaps not so difficult as it is trying on one’s patience with the need to tweak, print, tweak, print and repeat the process over and over to find a sweet spot where all of the settings work in harmony to produce a good print. The only thing that keeps me going is seeing that other people have these same problems and that others have solved many of them.
I use Mach3 as the CNC controller for my router and I love it. Mach 3 has always served me well which is why I decided that it was going to be the system which would run the actual machine for printing the 3D items. Having previous CNC machine tuning experience has helped a lot with the motor drive portion of setup. I created a new profile for the router that was in Metric/mm units. If you’re using inch units in Mach3, your new setup will need to be re-calibrated for Metric/mm to be compatible with most slicing software. (The software will switch the machine into mm units through G-Code, but it’s much easier to have a calibrated Mach3 setup for it!) Once you set the motor tuning parameters such as ‘steps per unit’ you’ll need to calibrate the motor travel via the “Set Steps Per Unit” in the Settings window of Mach3 which is accessible by pressing alt-6. The “Set Steps per Unit” button is right above the reset button.
On a converted machine you have to be careful with the inertia that heavy cross beams and axis can have. Small RepRap and Makerbot type machines can move the head relatively quickly because they have very little mass. This means that if they have good bearings and drive systems they can print super fast. With a converted CNC machine you’ll have to settle for a little lower speed. Slamming a 35 pound x-axis which is carrying a 15 pound z-axis at 3600mm a minute / 141ipm with high acceleration can make your CNC machine walk across the room and shake the whole house if your acceleration is set too abruptly. If you set the acceleration too soft it can ruin your 3D print. More on that later, though.
What is pretty difficult though is knowing which slicing / skeining software to use for your 3D printer setup. The skeining software takes your 3 dimensional model in .stl format and slices it vertically in to layers 10ths of a mm thick which the nozzle can then lay down on the build surface. The thickness depends on the size of your extruder nozzle and the quality of print that you need. Some people are printing down to 0.1mm or less with a 0.35mm nozzle.
There are programs such as Slic3r, Skeinforge, Kisslicer and Cura and other packages, or variations of packages, which make using slicing programs such as Skeinforge easier. Most of them are open source projects and freely available for download. I started out using and older version of Slic3r and eventually upgraded to the latest, but I have also tried Kisslicer as well. In some situations Kisslicer works out better and had a better preview, but I find myself going back to Slic3r when the gCode isn’t generated properly in Kisslicer. Sometimes Slic3r doesn’t generate the code properly either, which gets annoying.
In my next post at the end of this week (Week of Jan 21, 2013) I’ll write more about the setup for the 3D Printer. It’s late and I need to wrap this up for now. If you’re looking to Convert a CNC Router to a 3D Printer it certainly is possible, and I have photos to prove it, but I still have a long way to go in the tuning department.
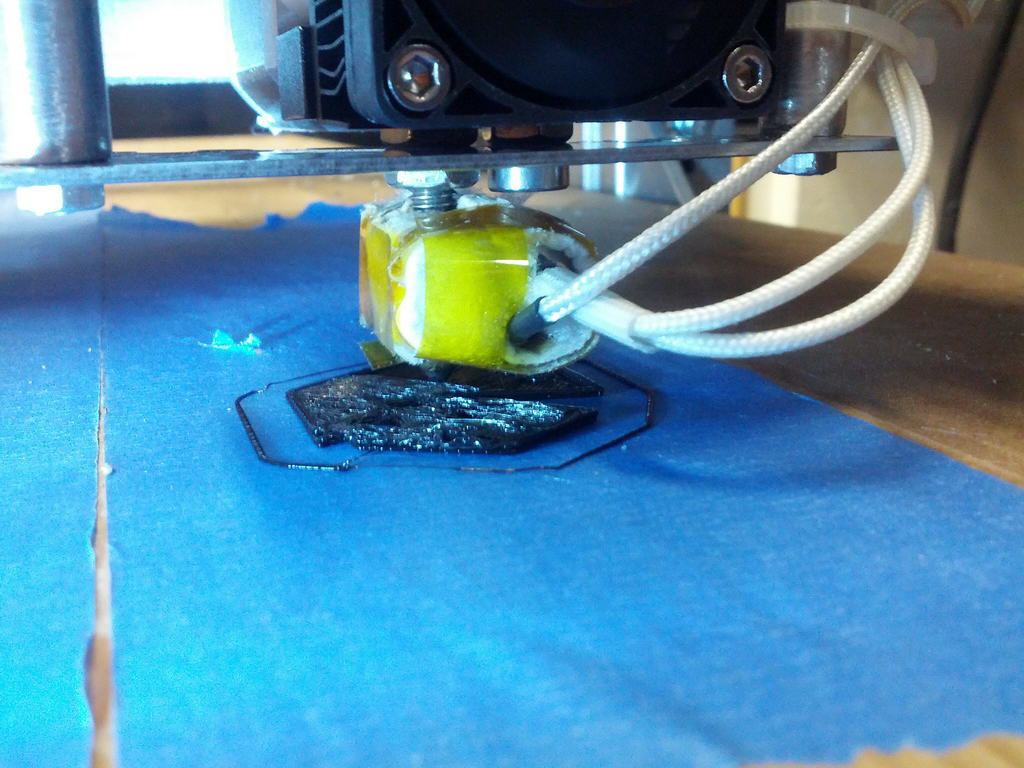
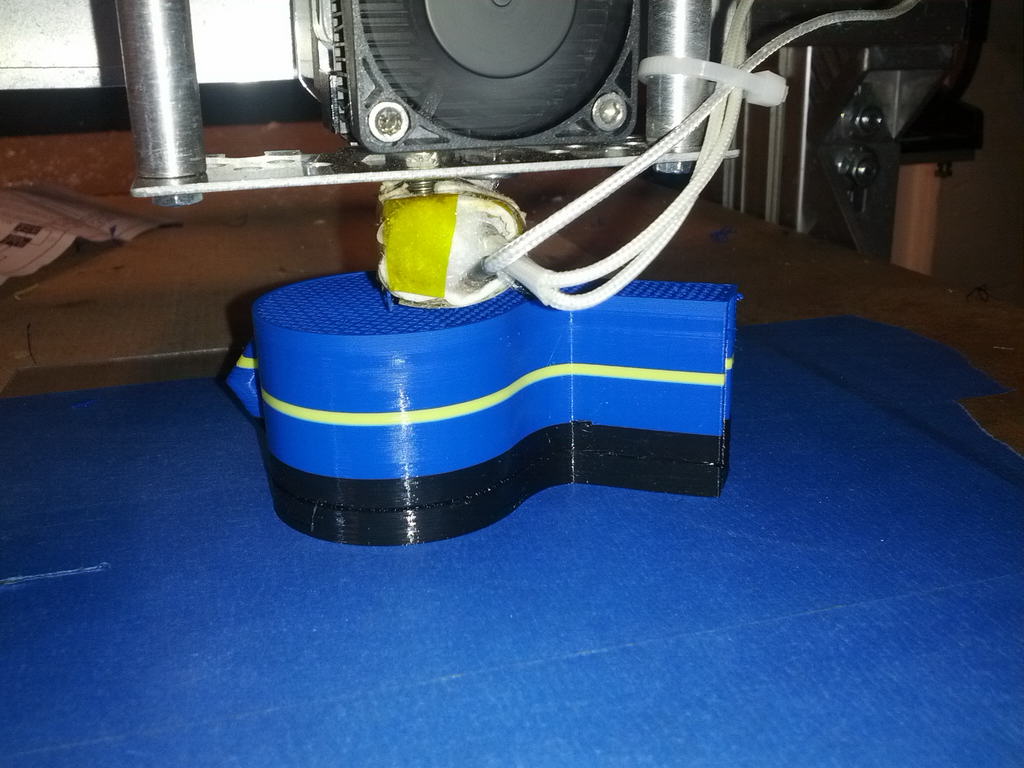
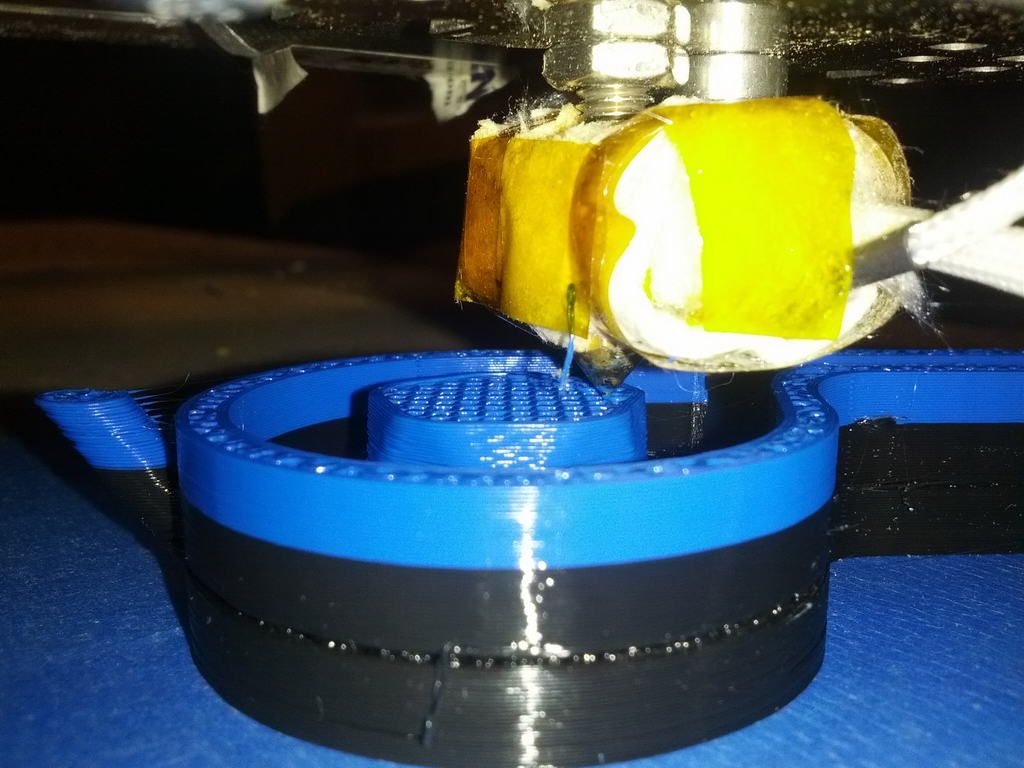
For now here’s the biggest thing I’ve printed so far and a quick video as well! All of my prints so far have been at a 0.2mm layer height with PLA on a 0.35mm nozzle with extruder temperature varying from 180-220 and with and without additional fan cooling.

12 responses to Convert a CNC Router to a 3D Printer
I read a story once of a researcher who build a 6 foot police whistle. He attached an air compressor to it switched it on and dropped dead! He looked OK from the outside but all his internal organs were mush.Seems the frequencies were strong enough to catastrophically vibrate his internal organs until they came apart!
This possibly was in a book by Lyall Watson, not too sure it was a long time ago I read it.
I hope you still have all your guts intact. Super article, thanks for posting.
Very nice conversion. I want to inform you and other makers about a web page who are selling CNC to 3D printer conversion electronics. All the controllers are open source. There are also stepper motor controllers. As you mentioned in your post the temperature control is very important for getting nice results. The PID controller on the market are not optimized for extruder temperature control. They are specially for industrial control of large masses. Anyway these controllers here may help you.
http://makerstorage.com/
Jon
I’m heading down the same path and adding a 3d head to my cnc. Do you have a recommended parts list?
Hi, good project 🙂 I don’t know of any ready to go setups, but there may be something out there if you look. For a hot end I really like the E3D hotend, it’s all metal and can do nylon type high temp materials which is nice. For a temperature controller you could use a PID temperature process controller from eBay or something and replace the thermistor on the E3D end with a thermocouple instead. Mounts and stuff would have to be custom made and you’ll need a filament drive mechanism as well. Try checking out some forum sites like CNCzone.com and reprap.org for more ideas. Good luck with your project.
Thanks for the feedback. Not looking for a kit, my entire system is custom, so I’m looking to cherry pick al the parts.
I’ve got my initial list built, but the filament drive mechanism is escaping me, any recommendations? Something that will work with the E3D? I already have a nema 17 to run it.
An interesting project for the winter.
On my minimill and minilathe conversions, a ramp up to speed is required. I guess this would not work too well with a printer,it would cause unevenness?
Do you sell this printer?
What is the largest object size that can be print?
May we use cnc work/function , after convertion into 3d printer?
Could it be suit to 5 axis cnc function for milling foam, wood ,stone and even metal?
I ask to send answer to my mail.
There is a special controller board optimized for 3d printer temperature controller. Take a look at the web page
cnc2printer3d.wordpress.com
Did you have any particular challenges with the PID tempature controller configuration? Are you using a thermocouple? I was looking at doing a similar conversion, and had been searching eBay for PID controllers to use for a heated bed and extruder, wondering if you would recommend any particular PID controller?
The cheap chinese temp controller I was using was waaay off on the temps it was reading which I think was causing a lot of problems. I’ve since gone to a standalone 3D printer which uses thermistors and a RAMPS controller, however I did buy a Watlow 96 PID controller on eBay to replace the junk one. I’ve used a Watlow 96 before on my copper vapor laser project and it works well and reads right.
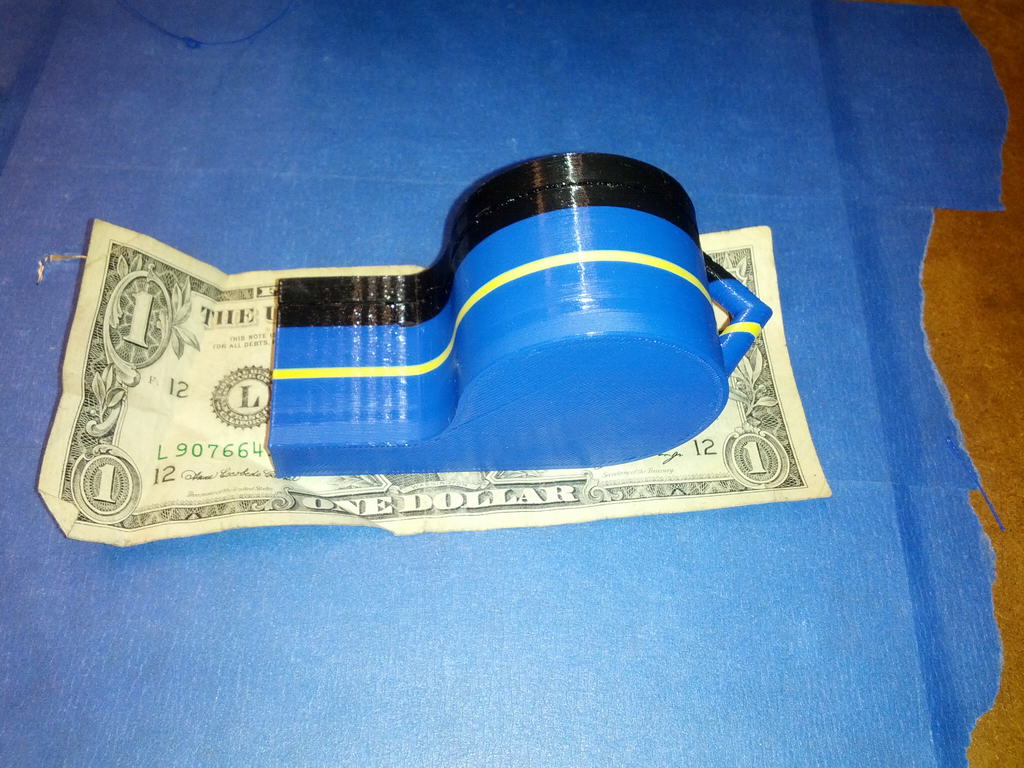
Good conversion but I have to ask if the whistle actually work?
The small whistle worked, the big whistle actually lets too much air out of the sides to work (it’s not water tight) and if I cover the sides with my hands it just barely whistles. I’m sure if I upped the extrusions value and had more solid fill it would work fine.
Leave a reply to Convert a CNC Router to a 3D Printer